MikroTik RouterOS Complete Setup Guide For Beginners
MikroTik RouterOS is a powerful operating system used to manage network infrastructure. When it comes to configuring your MikroTik RouterOS for the first time, it can be a daunting experience, but there's no need to feel overwhelmed. In this guide, we will take you through the process of configuring your MikroTik RouterOS so that you can get up and running with your network.
Getting started with MikroTik RouterOS
Before we start configuring your MikroTik RouterOS, you will need to make sure you have the following:
- A MikroTik RouterOS device
- An Ethernet cable to connect your router to your computer
- Your computer
Step 1: Access your MikroTik RouterOS device
In order to access your MikroTik RouterOS device, you will first need to connect your router to your computer using an Ethernet cable. Once your router is connected to your computer, open your preferred web browser and enter the IP address of your router into the address bar. The default IP address for MikroTik RouterOS is 192.168.88.1.
Step 2: Login to your MikroTik RouterOS device
Once you have accessed your MikroTik RouterOS device, you will need to login. The default username is admin and the default password is blank. If you have changed your login credentials, enter your updated username and password. If you have forgotten your login credentials, you will need to reset your device to the default settings.
Step 3: Configure basic settings
Once you have successfully logged in to your MikroTik RouterOS device, you will need to configure some basic settings:
- Set a password for your router to prevent unauthorized access.
- Set your time zone to ensure that your network and router have accurate time and date settings.
- Configure your LAN IP settings.
- Configure your WAN IP settings.
Setting a password for your router
Setting a password for your router is an essential step to ensure that your device is secure. To set a password for your router, navigate to the System > Password tab. Enter your new password twice and click on the Change Password button.
Set your time zone
In order to set your time zone, navigate to the System > Clock tab. Select your time zone from the drop-down menu and click on the Set Time Zone and Date button.
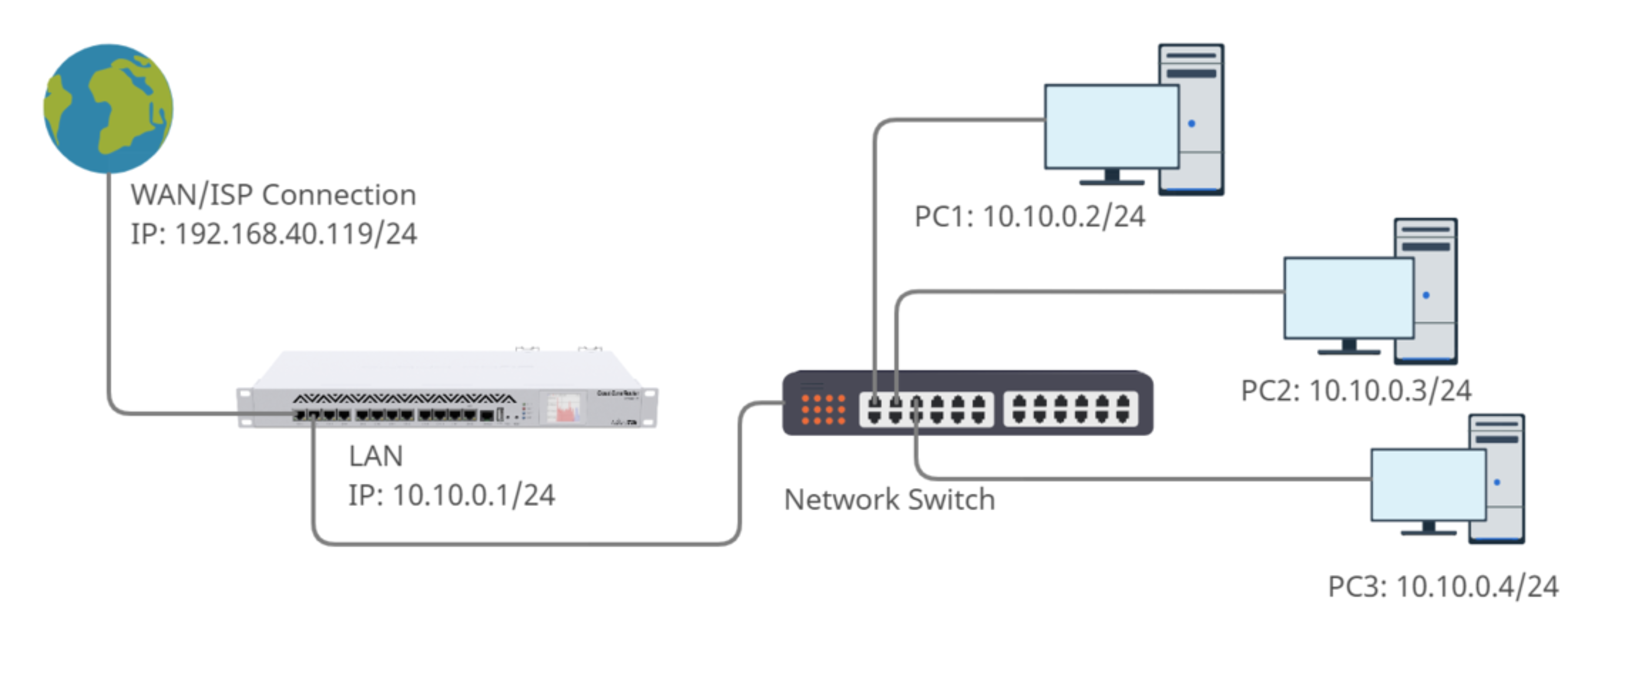
Configure your LAN IP settings
Configuring your LAN IP settings is essential to ensure that your devices are connected to the correct network. To configure your LAN IP settings, navigate to the IP > Addresses tab. You will see a list of network interfaces, including the LAN interface. Click on the Edit button next to the LAN interface. Enter your IP address, subnet mask, and gateway address. Click on the Apply button to save your settings.
Configure your WAN IP settings
Configuring your WAN IP settings is essential to ensure that your router can connect to the internet. To configure your WAN IP settings, navigate to the IP > DHCP Client tab. Click on the Add button to add a new client. Enter your client name, the interface you want to use, and click on the Apply button. Your router will then automatically obtain an IP address from your internet service provider.
Step 4: Configure wireless settings
If you have a wireless router, you will need to configure your wireless settings to ensure that you can connect to your network wirelessly. To configure your wireless settings, navigate to the Wireless tab. Click on the Scan button to scan for wireless networks in your area. Select your network name and enter your wireless password. Click on the Connect button to connect to your wireless network.
Step 5: Configure firewall settings
Firewall settings are essential to protect your network from unauthorized access and attacks. To configure your firewall settings, navigate to the IP > Firewall tab. Click on the Add button to add a new rule. Select your action, protocol, and input interface. Enter your source and destination addresses and ports. Click on the Apply button to save your settings.
Step 6: Test your connection
Once you have configured your MikroTik RouterOS device, you will need to test your connection to ensure that everything is working correctly. Navigate to the Tools > Ping tab. Enter an IP address that you want to test and click on the Start button. If you receive a response, your connection is working correctly.
Conclusion
Configuring your MikroTik RouterOS device for the first time can seem like a daunting task, but by following these simple steps, you can get up and running with your network quickly and easily. Remember to always maintain the security of your network by setting strong passwords, configuring your firewall settings, and keeping your router firmware up to date.
Post a Comment for "MikroTik RouterOS Complete Setup Guide For Beginners"