Redundant Proxy Setup With MikroTik Routers
If you have never heard of MikroTik before, let us give you a brief overview. MikroTik is a Latvian company that manufactures network equipment, primarily wireless routers and network switches, for internet service providers and other small businesses. Their equipment is known for being customizable and powerful, making it a popular choice for network administrators.

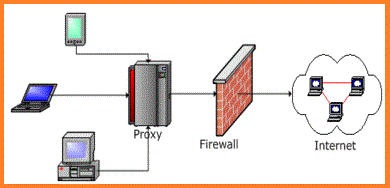
If you are working in a small to medium-sized network, or even a home network, you may have the need for a proxy server that can handle external traffic. Using a MikroTik router, you can accomplish this task quite easily. In this article, we will walk you through the steps of setting up a proxy server on a MikroTik router using an external server.
What is an External Proxy Server?
First, let's define what we mean by an external proxy server. An external proxy server is a server that is not located on the same network as the devices that are accessing it. External proxy servers are often used to bypass network restrictions, such as those found in a corporate environment, or to increase security and anonymity on the internet.
Setting Up a MikroTik Router with an External Proxy Server
Now that we have defined what we mean by an external proxy server, let's get into the steps for setting up a MikroTik router with an external proxy server.
Step 1: Create a New Bridge
The first step in setting up a MikroTik router with an external proxy server is to create a new bridge. A bridge is a network device that connects two or more network segments together. To create a new bridge, follow these steps:
- Log into your MikroTik router using your web browser.
- Click on "Bridge" in the left-hand menu.
- Click on the "Add New" button at the bottom of the page.
- Enter a name for your new bridge in the "Name" field.
- Click on the "OK" button.
Once you have created your new bridge, you will need to configure it to work with your external proxy server.
Step 2: Configure the Bridge
The next step is to configure the bridge to work with your external proxy server. To do this, follow these steps:
- Click on "Bridge" in the left-hand menu.
- Select your new bridge from the list of bridges.
- Click on the "Ports" tab.
- Click on the "Add New" button at the bottom of the page.
- Select "Ether" from the "Interface" dropdown menu.
- Select the Ethernet port that you want to use for your external proxy server from the "Master Port" dropdown menu.
- Click on the "OK" button.
Once you have configured your bridge, you will need to configure your MikroTik router to use your external proxy server.
Step 3: Configure the Proxy Server
The next step is to configure your MikroTik router to use your external proxy server. To do this, follow these steps:
- Click on "IP" in the left-hand menu.
- Click on "Web Proxy" in the submenu.
- Click on the "Settings" tab.
- Enter the IP address of your external proxy server in the "Address" field.
- Enter the port number of your external proxy server in the "Port" field.
- Enter the username and password for your external proxy server in the "Username" and "Password" fields.
- Click on the "OK" button.
Once you have configured your proxy server, you will need to configure your MikroTik router to use it.
Step 4: Configure the Firewall to Allow External Traffic
The next step is to configure your firewall to allow external traffic to pass through to your proxy server. To do this, follow these steps:
- Click on "IP" in the left-hand menu.
- Click on "Firewall" in the submenu.
- Click on the "NAT" tab.
- Click on the "Add New" button at the bottom of the page.
- From the "Chain" dropdown menu, select "srcnat".
- From the "Out. Interface" dropdown menu, select the Ethernet port that you want to use for your external traffic.
- Enter the IP address of your external proxy server in the "Dst. Address" field.
- Click on the "Action" dropdown menu and select "masquerade".
- Click on the "OK" button.
Once you have configured your firewall, you should be all set up to use your MikroTik router with your external proxy server.
Conclusion
As you can see, setting up a MikroTik router with an external proxy server is not too difficult. Once you have followed the steps outlined in this article, you should be all set up to use your router with your external proxy server. If you are looking for a powerful and customizable router for your network, a MikroTik router may be just what you need.


Post a Comment for "Redundant Proxy Setup With MikroTik Routers"