Creating A VPN Network With MikroTik RouterOS A Complete Walkthrough
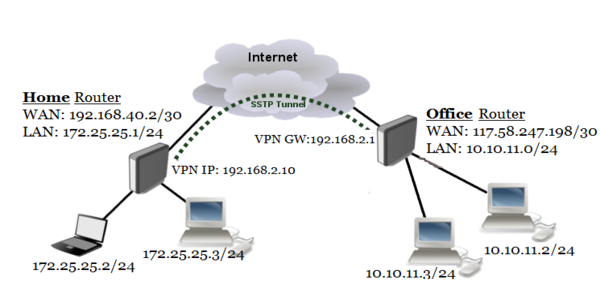
If you have multiple locations or branch offices and want to securely connect them, a Site to Site VPN connection is the way to go. MikroTik RouterOS provides a variety of VPN options and in this post, we will go over how to set up a Site to Site SSTP VPN using RouterOS client.
SSTP (Secure Socket Tunneling Protocol) is a VPN protocol that uses SSL/TLS transport protocols. Unlike other VPN protocols, SSTP is not susceptible to port blocking and can be used on any network that allows HTTPS traffic. SSTP is a secure and reliable VPN protocol, making it a great choice for Site to Site VPN connections.
Before we begin, make sure you have RouterOS installed on both routers or devices that will be used for the VPN connection.
Details
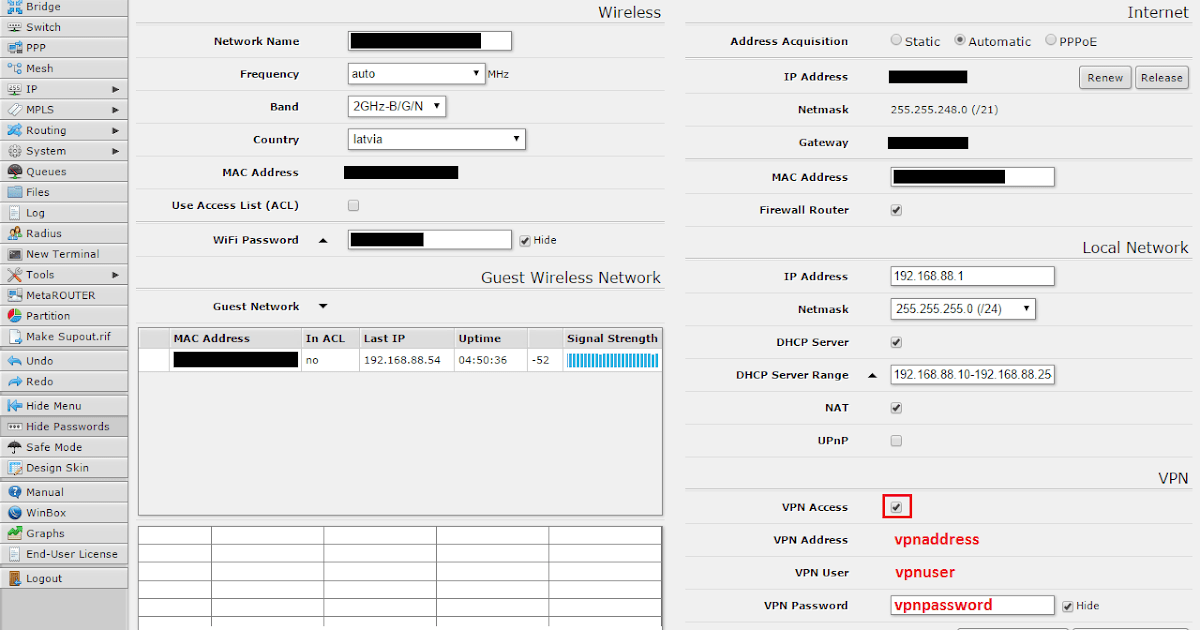
The first step in setting up a Site to Site SSTP VPN connection is to configure the server-side router.
- Log in to the RouterOS web interface.
- Go to the PPP tab and select the SSTP Server option.
- Enable the SSTP Server by checking the Enabled box.
- Enter a Local Address and Remote Address for the VPN connection.
- Configure the Authentication and Encryption settings.
- Add static IP addresses for the client-side routers or devices that will connect to the VPN.
- Click Apply and Ok to save the settings.
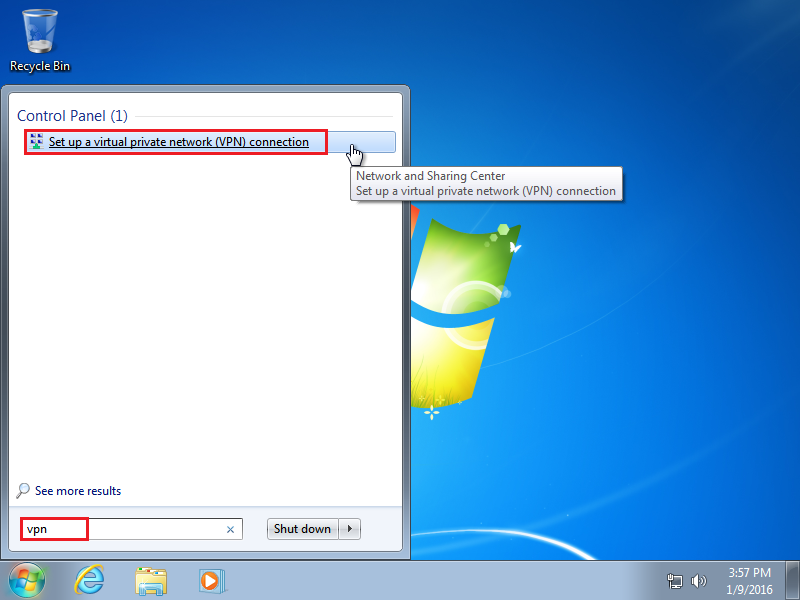
The next step is to configure the client-side router or device.
- Log in to the RouterOS web interface.
- Go to the PPP tab and select the SSTP Client option.
- Enter the Server Address and Username and Password for the VPN connection.
- Configure the Authentication and Encryption settings to match the server-side settings.
- Click Apply and Ok to save the settings.
Once the client-side router or device is configured, the VPN connection should be established and you should be able to communicate between the two locations.
Tips
Here are some tips to ensure a smooth and secure Site to Site SSTP VPN connection:
- Use strong and unique passwords for the VPN connection.
- Regularly update the RouterOS firmware to ensure the latest security and performance improvements.
- Enable firewall rules on both the client and server-side routers to limit access to the VPN connection and prevent unauthorized access to other resources.
- Configure routing rules to ensure traffic is routed through the VPN connection only when necessary.
FAQ
What is a Site to Site VPN?
A Site to Site VPN is a connection between two or more locations that allows secure communication over the internet or other public networks. It enables resources such as files, printers, and databases to be shared between the locations, as if they were on the same network.
What is SSTP?
SSTP (Secure Socket Tunneling Protocol) is a VPN protocol that uses SSL/TLS transport protocols. Unlike other VPN protocols, SSTP is not susceptible to port blocking and can be used on any network that allows HTTPS traffic. SSTP is a secure and reliable VPN protocol, making it a great choice for Site to Site VPN connections.
What are the advantages of using SSTP for Site to Site VPN?
SSTP is a secure and reliable VPN protocol that uses SSL/TLS transport protocols. It is not susceptible to port blocking and can be used on any network that allows HTTPS traffic. SSTP provides a high level of security for Site to Site VPN connections and is a great choice for organizations that require a secure and reliable VPN solution.
Can I use SSTP for remote access VPN?
Yes, SSTP can be used for remote access VPN connections. It provides a secure and reliable VPN solution for remote workers who need to connect to corporate resources over the internet.
Is SSTP supported on all MikroTik routers?
SSTP is supported on most MikroTik routers that run RouterOS v6.0 and above. However, some older and lower-end routers may not support SSTP due to hardware limitations.
Setting up a Site to Site SSTP VPN connection using RouterOS client is a secure and reliable way to connect multiple locations and enable resources to be shared between them. Follow the steps and tips outlined in this post to ensure a smooth and secure VPN connection.

Post a Comment for "Creating A VPN Network With MikroTik RouterOS A Complete Walkthrough"