MikroTik Router Configuration For VoIP Networks
Hey there, friends! So you're interested in Mikrotik router configuration, huh? Well, you've come to the right place. Let me break it down for you in a way even your grandma could understand.

First off, let's talk about what a Mikrotik router is. It's basically a device that helps manage internet traffic within a network. Now, let's get into the nitty-gritty of how to configure one.
Step 1: Connect to the Router
First things first, you gotta connect to the router. Make sure you have the necessary equipment like an ethernet cable and a computer. Connect the ethernet cable from the router to your computer's ethernet port. Then, open up your favorite web browser and type in the IP address of the router. You should be able to find this on the bottom of your router or in the documentation that came with it.
Step 2: Set Up Basic Configuration
Once you're connected to the router, you'll need to set up some basic configuration settings. This includes things like the router's name, time zone, and password. Make sure to choose a strong password that's hard to guess. You don't want any uninvited guests piggybacking off your network.
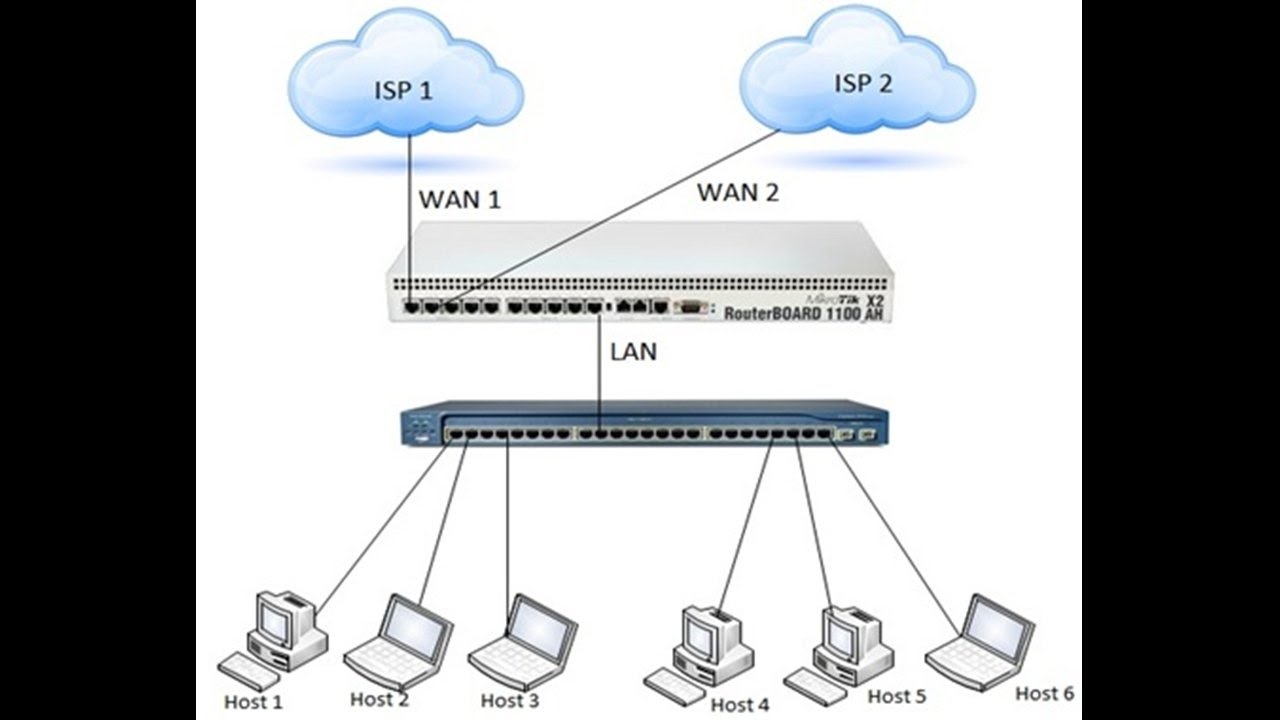
Step 3: Configure Network Interfaces
The next step is to configure your network interfaces. This determines how your router communicates with the outside world. You'll need to set up at least one interface for your WAN (wide area network) connection, which is usually your internet connection. You may also need to set up additional interfaces for your LAN (local area network).
Step 4: Set Up Firewall Rules
Now that your interfaces are set up, you need to set up some firewall rules. This is like a security guard for your network, keeping the bad guys out. Make sure to set up rules for both inbound and outbound traffic. You can decide what traffic is allowed and what traffic is blocked.
Step 5: Configure DHCP Server
The DHCP (Dynamic Host Configuration Protocol) server is responsible for assigning IP addresses to devices on your network. You'll need to set up the DHCP server so that devices on your network have unique, identifiable IP addresses. This will allow them to communicate with each other and the outside world.
Step 6: Configure NAT
NAT (Network Address Translation) is what allows devices on your LAN to communicate with devices on the internet. You'll need to set up NAT rules so that traffic is directed to the correct devices on your network.
Step 7: Set Up Wireless Access Point
If you have wireless devices on your network (and let's be honest, who doesn't?), you'll need to set up a wireless access point. This will allow your devices to connect to your network wirelessly. You'll need to set up security settings like a strong password so that unauthorized users can't hop on your network.
Well, there you have it folks. That's the basic rundown of Mikrotik router configuration. Hopefully, this has demystified the process a bit for you. Happy configuring!


Post a Comment for "MikroTik Router Configuration For VoIP Networks"