Exploring Reverse Proxy Servers And Their Applications
If you're unfamiliar with what a reverse proxy is or how to set one up, don't worry – we've got you covered! In this post, we'll walk you through the process of setting up a reverse proxy on both Nginx and Apache web servers. But first, let's dive into what a reverse proxy is and why you might want to use one.
What is a Reverse Proxy?
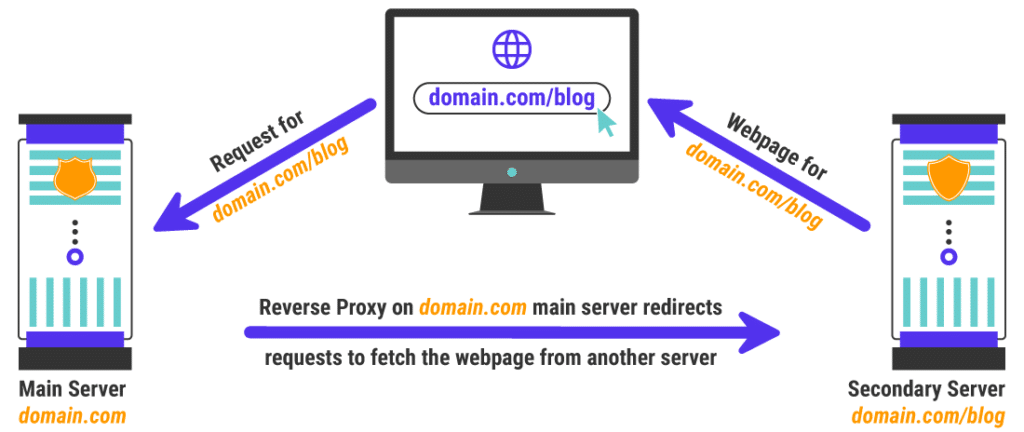
A reverse proxy is a web server that sits in front of one or more web servers, ultimately serving as a mediator between clients (like web browsers) and servers (like Apache or Nginx web servers). Rather than directly serving content to clients as traditional web servers would, a reverse proxy intercepts incoming client requests and routes them to the appropriate server. This can be especially useful in a number of situations:
- If you have multiple servers hosting your website, a reverse proxy can distribute incoming requests between them, helping to balance server loads and prevent any one server from becoming overloaded.
- A reverse proxy can also be used to protect your web servers from direct contact with the internet and potential security threats. By sitting on the front lines, a reverse proxy can filter incoming requests and block any that might pose a threat to your servers.
- If you're working with multiple domains or subdomains, a reverse proxy can help route requests to the appropriate server based on the domain or subdomain in question.
- A reverse proxy can also be used to serve static content directly (like images or CSS files). This can help reduce load times and improve overall website performance.
Setting Up a Reverse Proxy on Nginx
If you're working with an Nginx web server, setting up a reverse proxy is relatively straightforward. Here's how:
Step 1: Installing Nginx
If you haven't already, you'll need to install Nginx on your server. Depending on your system, you can typically do this by running the following command:
$ sudo apt-get install nginx Step 2: Configuring Nginx as a Reverse Proxy
Once Nginx is installed, you'll need to configure it to act as a reverse proxy. This involves two main steps:
- Adding a new server block for each server you want to proxy
- Configuring a location block in each server block that tells Nginx how to proxy incoming requests
server listen 80; server_name example.com; location / proxy_pass http://localhost:8080; proxy_set_header Host $host; proxy_set_header X-Real-IP $remote_addr; Setting Up a Reverse Proxy on Apache
If you're working with an Apache web server, setting up a reverse proxy can be slightly more complicated. Here's what you'll need to do:
Step 1: Installing Apache
As with Nginx, the first step is to make sure that Apache is installed and running on your server. This can typically be done with the following command:
$ sudo apt-get install apache2 Step 2: Enabling Required Modules
Next, you'll need to enable a few required Apache modules:
$ sudo a2enmod proxy $ sudo a2enmod proxy_http $ sudo a2enmod proxy_html $ sudo a2enmod xml2enc Step 3: Configuring Apache as a Reverse Proxy
Once the required modules are enabled, you can begin configuring Apache to act as a reverse proxy. This involves creating a new virtual host block for each server you want to proxy. Here's an example of what this might look like for a server running on port 8080:
<VirtualHost *:80> ServerName example.com ProxyPreserveHost On ProxyPass / http://localhost:8080/ ProxyPassReverse / http://localhost:8080/ </VirtualHost> Wrapping Up
That's it – you should now have a fully functioning reverse proxy set up on your web server! Whether you're working with Nginx or Apache, setting up a reverse proxy can be a great way to improve website performance, protect your servers from security threats, and balance server loads. Give it a try today and see how it works for you!


Post a Comment for "Exploring Reverse Proxy Servers And Their Applications"