Proxy Server Logging And Monitoring With MikroTik Router
Setting up a web proxy server on your MikroTik router helps to improve your network's speed and security by caching frequently accessed web pages. In this post, we will guide you through the process of configuring a transparent proxy server on your MikroTik router. But first, let’s take a look at what a transparent proxy server is and how it works.

What is a Transparent Proxy Server?
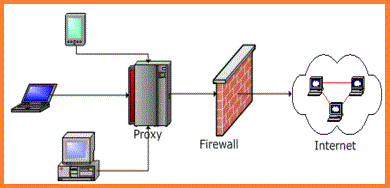
A transparent proxy server is a type of proxy server that intercepts all traffic between a client and a server without requiring any client-side configuration. With a transparent proxy server, clients don't have to configure their browser or network settings to use the proxy server. Instead, the server is configured to intercept traffic and forward it to the destination server.
Advantages of using a Transparent Proxy Server
Here are some of the reasons why you should consider using a transparent proxy server on your MikroTik router:
- Improved network speed: Since the transparent proxy server caches frequently accessed web pages, it can significantly improve the network speed by reducing the amount of data that needs to be transferred over the internet.
- Reduced data usage: As the proxy server caches web pages, it reduces the amount of data that needs to be transferred over the internet. This can help to reduce data usage and save money for users with limited data plans.
- Enhanced network security: The transparent proxy server can also be used to block malicious websites and prevent users from accessing them. It can also be configured to block access to websites that contain adult content or other inappropriate material.
Configuring a Transparent Proxy Server on your MikroTik Router
Follow these steps to configure a transparent proxy server on your MikroTik router:
Step 1: Create a new access list
The first step is to create a new access list that will be used to define which traffic should be forwarded to the proxy server. To create a new access list, follow these steps:
- Open Winbox and connect to your MikroTik router.
- Click on "IP" in the menu on the left and select "Firewall".
- Click on the "Address lists" tab.
- Click on the "+" button to create a new address list.
- Enter a name for the new access list (e.g., "Proxy Access List").
- Enter the IP addresses or IP ranges that should be forwarded to the proxy server in the "Address" field. For example, you can enter "192.168.0.0/24" to forward all traffic from the 192.168.0.0/24 subnet to the proxy server.
- Leave the "Comment" field empty.
- Click "OK" to create the new access list.
Step 2: Create a new NAT rule
The next step is to create a new NAT rule that will be used to forward traffic from the access list to the proxy server. To create a new NAT rule, follow these steps:
- Click on the "NAT" tab in the "Firewall" window.
- Click on the "+" button to create a new NAT rule.
- Enter a name for the new NAT rule (e.g., "Proxy Rule").
- Select "srcnat" for the "Chain" field.
- Select the interface that should be used for the NAT operation in the "Out. Interface" field. For example, you can select "ether1" if you want to use the Ethernet interface on your router.
- Enter the access list name that you created in step 1 in the "Src. Address List" field. For example, you can enter "Proxy Access List" in the field.
- Select "masquerade" for the "Action" field.
- Leave the "To Addresses" and "Comment" fields empty.
- Click "OK" to create the new NAT rule.
Step 3: Configure the Proxy Server
The next step is to configure the proxy server on your MikroTik router. To do this, follow these steps:
- Click on "IP" in the menu on the left and select "Web Proxy".
- Check the "Enable" box.
- Enter the port number that you want to use for the proxy server in the "Port" field. For example, you can enter "8080" to use port 8080 for the proxy server.
- Enter the IP address of the interface that should be used for the proxy server in the "Address" field. For example, you can enter "192.168.0.1" if you want to use the IP address of the Ethernet interface on your router.
- Leave the "Parent Proxy", "Cache Drive", and "Cache Size" fields empty.
- Click "Apply" to save the changes.
Step 4: Test the Proxy Server
The final step is to test the transparent proxy server to confirm that it is working correctly. To do this, follow these steps:
- Open your web browser and go to a website that you have not accessed before.
- Check the network traffic to confirm that the traffic is being forwarded to the proxy server.
- Access the same website again and check the network traffic to confirm that the web page is loaded from the cache on the proxy server.
Conclusion
Setting up a transparent proxy server on your MikroTik router is a simple process that can significantly improve your network's speed and security. By following the steps outlined in this post, you can configure your MikroTik router to intercept traffic and forward it to the proxy server without requiring any client-side configuration. Try it out today and see how it can improve your network's performance!


Post a Comment for "Proxy Server Logging And Monitoring With MikroTik Router"