A Comprehensive Guide To MikroTik Router Configuration
Are you feeling overwhelmed with setting up your Mikrotik Router OS? No need to worry, our team at Farmer People is here to help. With our expertise and experience in networking systems, we can guide you through the process of configuring your router in no time.

The Mikrotik Router OS is a powerful and versatile operating system that offers advanced controls and features for managing your network with ease. It offers a default login IP, username, and password that you can use to access the web interface and set up your router. In this post, we will explain in detail how to set up and configure your Mikrotik Router OS.
Setting up your Mikrotik Router OS
Before diving into the details of configuring your router, it's essential to set it up correctly first. Here are the steps:
Step 1: Connect your router
The first step is to connect your router to your modem or internet source using an Ethernet cable. Make sure both devices are turned off before connecting them. Once connected, turn on your modem or internet source and wait for it to boot up completely.
Step 2: Access the web interface
Next, you need to access your router's web interface to configure it. To do this, open a web browser on your computer and enter the default login IP address, which is 192.168.88.1, in the address bar and press Enter. This will take you to the login page for your router.
Step 3: Log in to your router
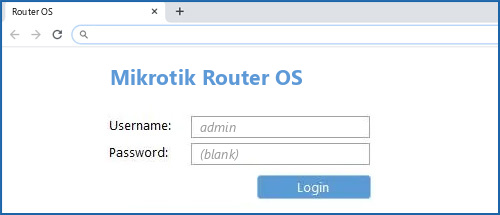
On the login page, enter the default username and password, which are both 'admin,' and click on the login button. This will log you into the web interface of your router.
Configuring your Mikrotik Router OS
Now that you've successfully logged into your router's web interface, it's time to configure it properly. Here are the essential configurations you need to make:
Change the username and password
The default username and password for your router are both 'admin,' which is not secure. It's essential to change them to something that's more secure and only known to you. To do this, click on the "System" tab on the left-hand side of the web interface and then select "Users." Here you can create a new username and password and delete the old one. Don't forget to save your changes.
Set up your wireless network
If you want to set up a wireless network, click on the "Wireless" tab on the left-hand side of the web interface and then select "Wireless Interfaces." Here you can add a new wireless network and configure its settings, such as network name (SSID), security settings, and encryption. Once you've made your changes, click on "Apply" to save them.
Configure your LAN and WAN settings
The Local Area Network (LAN) and Wide Area Network (WAN) settings are crucial in ensuring that your router is connected to your network correctly. To configure these settings, click on the "Interfaces" tab on the left-hand side of the web interface and select "Ethernet." Here you can configure your LAN and WAN settings, such as IP address, subnet mask, DHCP server, and DNS server. Once you've made your changes, click on "Apply" to save them.
Configure your firewall rules
The firewall rules are essential in protecting your network from unwanted access and attacks. To configure your firewall rules, click on the "IP" tab on the left-hand side of the web interface and select "Firewall." Here you can add new firewall rules and configure their settings, such as source IP address, destination IP address, protocol, and action. Once you've made your changes, click on "Apply" to save them.
Set up your DHCP server
The Dynamic Host Configuration Protocol (DHCP) server is essential in assigning IP addresses to devices on your network automatically. To set up your DHCP server, click on the "IP" tab on the left-hand side of the web interface and select "DHCP Server." Here you can configure your DHCP server settings, such as IP address range, lease time, and DNS servers. Don't forget to save your changes.
Update your router's firmware
Finally, it's essential to update your Mikrotik Router OS's firmware to ensure that it's running on the latest version with all the latest security patches and bug fixes. To update your firmware, go to the "System" tab on the left-hand side of the web interface and select "Packages." Here you can check for updates and install them.
Conclusion
Setting up and configuring your Mikrotik Router OS may seem daunting at first, but it doesn't have to be. With our step-by-step guide, you can configure your router like a pro in no time. Remember to protect your network by changing the default login credentials, setting up your firewall rules, and updating your firmware regularly.
If you still have any issues or concerns, our team at Farmer People is always available to assist you. Feel free to contact us anytime for expert advice and support.


Post a Comment for "A Comprehensive Guide To MikroTik Router Configuration"