Configuring MikroTik Router Firewall Rules For Network Protection
Are you tired of manually disabling and enabling your MikroTik interface? If so, you're in luck because we have the solution for you! With just a few simple steps, you can set up a schedule to automate this process.
Step 1: Create a Schedule
The first step is to create a schedule for when you want your interface to be disabled and enabled. To do this, go to the "System" menu and select "Scheduler." Click on the "Add New" button to create a new schedule.
Once you're in the "Add New Scheduler" menu, you can name your schedule and specify when you want it to run. For example, you could set it to run every day at 8am and then again at 5pm. You can also select how long you want the interface to be disabled and enabled.
Step 2: Create a Firewall Rule
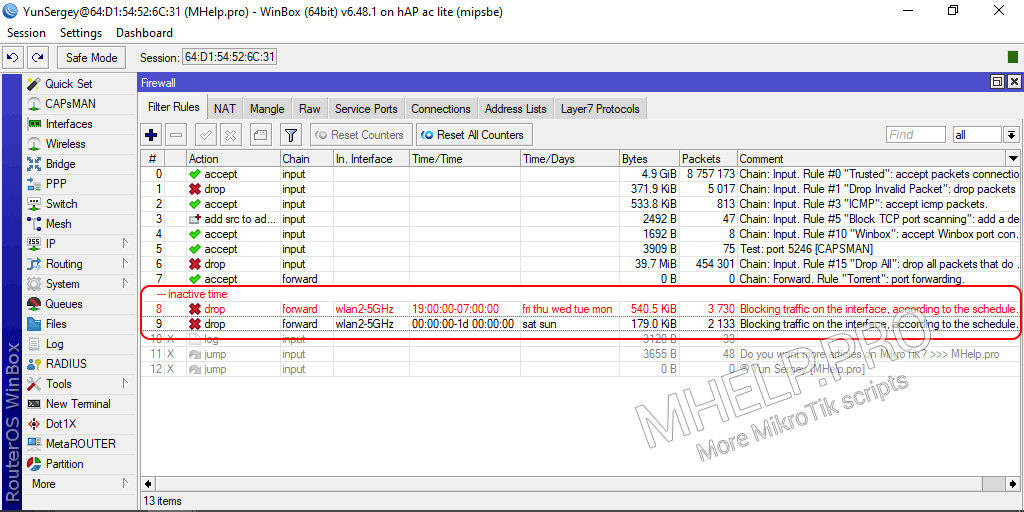
In order to disable and enable your interface based on your schedule, you'll need to create a firewall rule. Go to the "IP" menu and select "Firewall."
Click on the "Filter Rules" tab and then click on the "Add New" button. In the "General" tab, you can name your rule and specify the chain (which should be "forward") and the action (which should be "drop").
In the "Advanced" tab, you can specify the source and destination addresses. For example, you could set the source address to be your local network and the destination address to be any external network.
In the "Extra" tab, you can select the interface that you want to disable and enable based on your schedule. This is where you'll specify the interface that you want to automate.
Step 3: Add Scripting Commands
In order to automate the process of disabling and enabling your interface based on your schedule and firewall rule, you'll need to add some scripting commands. Go to the "System" menu and select "Scripts."
Click on the "Add New" button to create a new script. In the "General" tab, you can name your script and then add the following commands:
/interface set [find time-enabled=yes] disabled=yes /system scheduler set [find name=INTERFACE-NAME] disabled=yes
Replace "INTERFACE-NAME" with the name of your schedule.
Step 4: Add Script to Firewall Rule
The last step is to add your script to your firewall rule. Go back to the "Filter Rules" tab in the "Firewall" menu and click on the rule that you created in step 2.
In the "Advanced" tab, add the following command to the comment field:
:log info "INTERFACE-NAME is being disabled/enabled"; :execute /system script run [find name=SCRIPT-NAME]
Replace "INTERFACE-NAME" with the name of your interface and "SCRIPT-NAME" with the name of your script.
That's it! With these four simple steps, you can automate the process of disabling and enabling your MikroTik interface based on your schedule. This will save you time and make your network more efficient.
Remember, if you ever want to disable the automation, you can simply disable the schedule in the "System" menu under "Scheduler."


Post a Comment for "Configuring MikroTik Router Firewall Rules For Network Protection"