Configuring MikroTik Router As A Reverse Proxy Step-by-Step Guide
Are you tired of slow internet speeds and unreliable connections? You're not alone. Fortunately, there's a solution to this problem: MikroTik Load Balancing. With this technology, you can enjoy faster internet speeds, better reliability, and smoother browsing experience. In this post, we will explain in detail how to set up MikroTik Load Balancing over multiple gateways with 2 WAN connections. So, sit back, grab a cup of coffee, and let's get started!
What is MikroTik Load Balancing?
Before we dive into the details of setting up MikroTik Load Balancing, let's first understand what it is and why you need it. MikroTik Load Balancing is a technology that allows you to distribute network traffic across multiple connections. This means that if you have two or more internet connections, you can use them simultaneously to improve your internet speed and reliability. Load Balancing helps to distribute traffic evenly across all connections, ensuring that no single connection is overloaded and that your network runs smoothly.
Setting up MikroTik Load Balancing
Now that you know what MikroTik Load Balancing is and why you need it, let's move on to the details of setting it up. Here are the steps involved in the process:
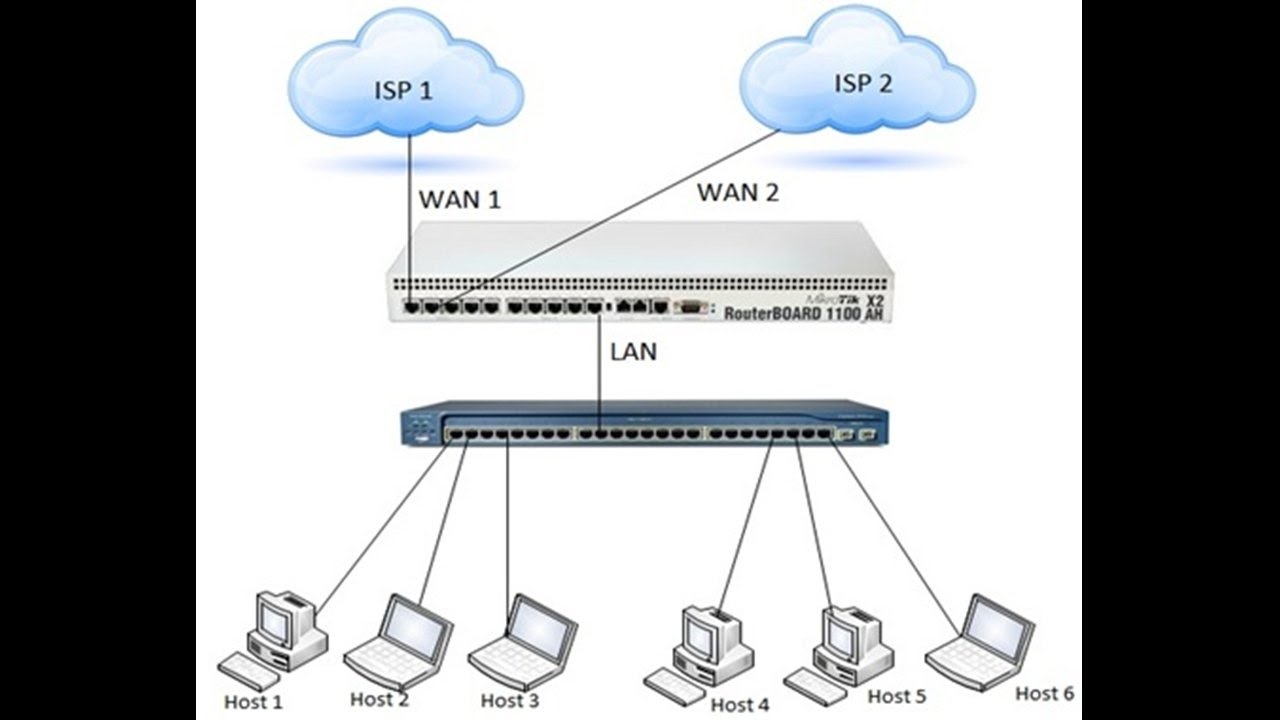
Step 1: Connect your devices to the network
Before you can set up MikroTik Load Balancing, you need to connect your devices to the network. This means connecting your modem, router, and any other devices, such as computers or gaming consoles, to the network.
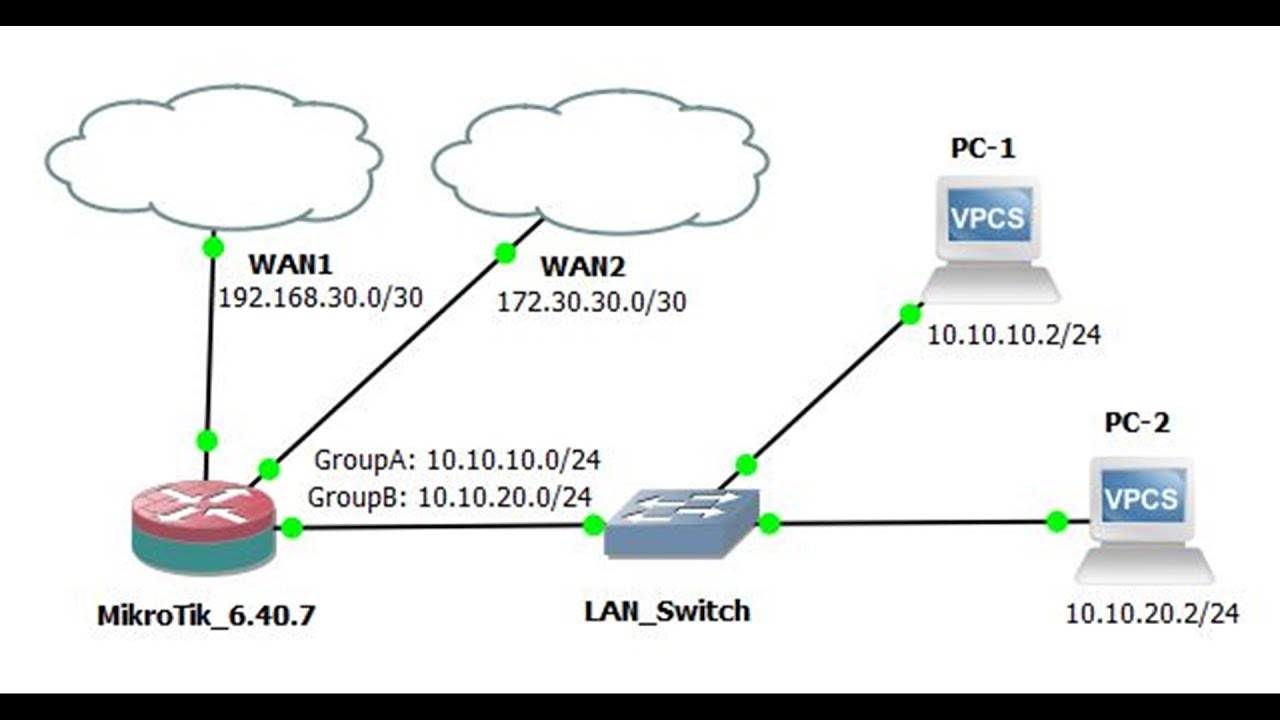
Step 2: Configure your WAN connections
The next step is to configure your WAN connections. This involves configuring your modem and router to connect to the internet. You will need to get the necessary information from your internet service provider, such as the IP address, subnet mask, gateway, and DNS servers. Once you have this information, you can configure your modem and router accordingly.
Step 3: Enable Load Balancing
Once your devices are connected to the network and your WAN connections are configured, you can enable Load Balancing. To do this, you will need to log into your router's web interface and navigate to the Load Balancing section. From there, you can enable Load Balancing and configure the settings to suit your needs.
Step 4: Configure Load Balancing settings
The next step is to configure the Load Balancing settings to suit your needs. This involves configuring the weight and priority of each WAN connection, as well as the failover policy. You can configure these settings based on your internet usage and requirements.
Step 5: Test and fine-tune your Load Balancing setup
Once you have configured Load Balancing, it's important to test your setup and fine-tune it if necessary. This involves checking your internet speed and reliability, monitoring your network traffic, and making adjustments as needed to optimize your setup.
Conclusion
MikroTik Load Balancing is a powerful technology that can help you to enjoy faster internet speeds, better reliability, and smoother browsing experience. By following the steps outlined above, you can easily set up Load Balancing over multiple gateways with 2 WAN connections. So, go ahead and try it out. You won't be disappointed!


Post a Comment for "Configuring MikroTik Router As A Reverse Proxy Step-by-Step Guide"