Configuring MikroTik Router As A Wireless Access Point Best Practices
Wireless networks are becoming increasingly popular in both commercial and residential settings. As a network administrator, it is important to be equipped with the skills to configure wireless access points to ensure maximum performance and security. In this post, we will discuss how to configure a MikroTik access point for optimal wireless network performance and security.

1. Configuring the Wireless Mode
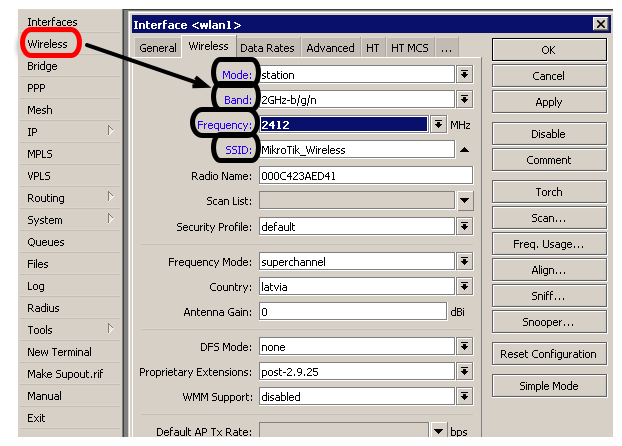
The first step in configuring a MikroTik access point is to set the correct wireless mode. MikroTik access points support several wireless modes, including Access Point, Station, Bridge, and WDS Station. For this tutorial, we will be configuring the access point mode.
2. Setting the SSID
The Service Set Identifier (SSID) is a unique name that identifies a wireless network. In the wireless settings menu, you need to set the SSID of your access point. Ensure that the SSID is unique and does not contain any sensitive information like passwords or personal information.
3. Configuring Security Settings
Wireless networks are susceptible to security threats, and it is crucial to secure your access point to prevent unauthorized access to your network. MikroTik access points provide several security options, including WPA2, WPA, and Open authentication. WPA2 is the most secure option, and we highly recommend using it. Additionally, you can configure a pre-shared key to further enhance security.
4. Configuring Frequency Bands
MikroTik access points support several frequency bands, including 2.4GHz and 5GHz. In most cases, we recommend using the 5GHz frequency band because it provides faster speeds and is less congested. However, you should also consider the range and compatibility of your wireless devices before selecting a frequency band.
5. Configuring Transmit Power
The transmit power settings determine the range of your access point. MikroTik access points provide several transmit power options, and you should select one that provides sufficient coverage for your network. However, it is important to note that increasing the transmit power can cause interference with neighboring networks, so you should ensure that you comply with local regulations.
6. Configuring QoS
Quality of Service (QoS) settings allow you to prioritize network traffic to ensure that important traffic, such as video calls and VoIP, receive sufficient bandwidth. You can configure QoS settings in the wireless interface settings menu.
7. Configuring DHCP Settings
The Dynamic Host Configuration Protocol (DHCP) is used to automatically assign IP addresses to devices on your network. You can configure DHCP settings in the DHCP settings menu. Ensure that you specify the IP address range and lease time.
8. Setting Up Guest Access
You may want to provide guest access to your network without compromising the security of your main network. MikroTik access points provide several options to enable guest access, including setting up a separate SSID or enabling a guest network option with limited access.
9. Configuring Monitoring and Management
MikroTik access points provide several management and monitoring features, including SNMP, bandwidth monitoring, and remote management. You can configure these settings in the management and monitoring menus.
Conclusion
Configuring a MikroTik access point involves several steps, including setting the wireless mode, configuring security settings, and configuring DHCP settings. By following the steps outlined in this post, you can ensure that your network is secure and maximizes performance. Remember to comply with local regulations and best practices when configuring your access point.


Post a Comment for "Configuring MikroTik Router As A Wireless Access Point Best Practices"