Best Practices For MikroTik Router Configuration And Setup
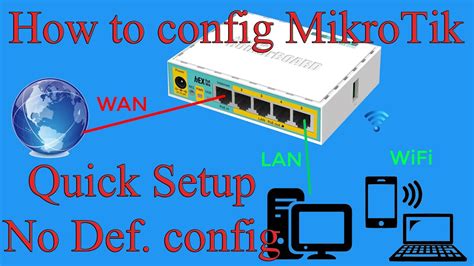
As technology advances, our reliance on networking has grown exponentially. Whether it be for personal or business use, it's crucial to have a router that provides reliable and secure internet connectivity. Among the many brands available, MikroTik routers are a popular choice due to their customizable configuration options. In this post, we will discuss how to configure a MikroTik router graphically to maximize efficiency and security. Firstly, it's important to understand the basics of router configuration. A router is essentially a device that connects two or more networks together and filters traffic between them. To access the MikroTik router configuration interface, open a web browser, type in the IP address of the router in the address bar, and press Enter. If you don't know the IP address of the router, use the command prompt and type "ipconfig" (for Windows) or "ifconfig" (for Linux or macOS) to find it. Once you're logged in to the MikroTik router configuration interface, you'll see the main dashboard. The first step is to set up the Internet connection. Click on the "IP" tab and select "DHCP Client" to automatically obtain an IP address from your Internet Service Provider (ISP). If you're using a static IP address, select "Static" and enter the IP address, subnet mask, and default gateway provided by your ISP. After setting up the Internet connection, click on the "Wireless" tab to enable Wi-Fi. Under the "Wireless Interfaces" menu, click on "Add New" to create a new wireless network. Enter a name for the network, select a frequency band (2.4 GHz or 5 GHz), and set the security mode to "WPA2" for maximum security. Enter a strong password and click "Apply" to save the settings. Now that the basic setup is complete, it's time to customize the configuration to suit your specific needs. This can be done using the graphical interface, which provides a visual representation of the various configuration options. To access the graphical interface, click on the "New Terminal" button at the top of the interface, and type "/ip firewall mangle" in the command prompt. This will open the graphical interface. In the graphical interface, you can customize the configuration settings by dragging and dropping different elements to create a custom configuration. For example, you can create a rule that blocks access to certain websites or services, or prioritizes traffic for certain applications or devices. The possibilities are endless, and the graphical interface makes it easy to visualize and apply these configurations. In addition to the graphical interface, MikroTik routers also support scripting using the MikroTik RouterOS scripting language. This allows for even greater customization and automation of configuration settings. For example, you can create a script that automatically backs up the configuration settings to a remote server on a regular basis, or that sends alerts when certain events occur. The scripting language is powerful and flexible, but does require some programming knowledge to use effectively. It's worth noting that while MikroTik routers are highly customizable, it's important to ensure that the configurations are secure and not vulnerable to external attacks. The router comes with a built-in firewall that can be customized to provide maximum security, but it's also important to keep the router firmware up-to-date, and to change the default login credentials to something strong and unique. In conclusion, configuring a MikroTik router graphically provides a powerful and flexible way to customize your network settings. Whether you're setting up a home network or a large corporate network, the MikroTik router provides the tools you need to create a highly customized, secure, and efficient network. With the help of the graphical interface and scripting language, it's easy to create custom configurations tailored to your specific needs. So why not give it a try and take your network to the next level? 


mikrotik router configuration setup
router mikrotik
mikrotik router configuration graphically
mikrotik vlan benisnous cisco pppoe routers


Post a Comment for "Best Practices For MikroTik Router Configuration And Setup"