MikroTik Router Configuration High Availability Setup
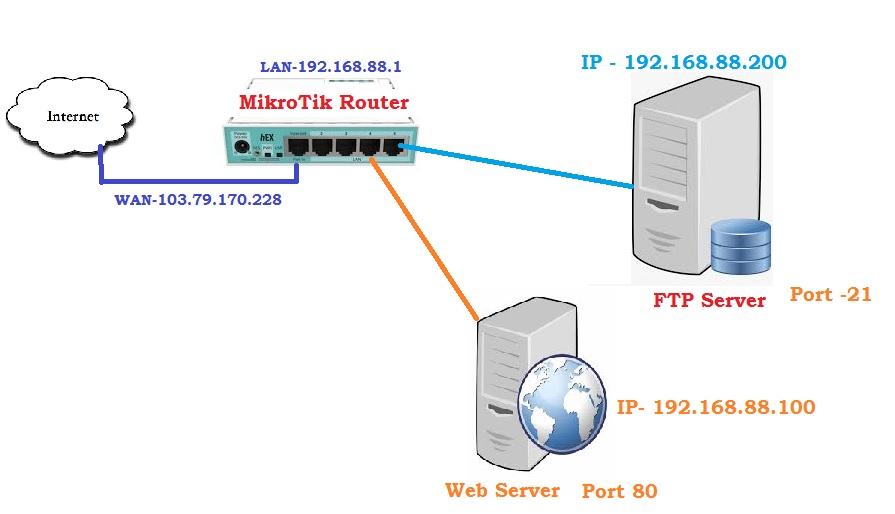
Alright y'all, we got some important information to share with y'all about configuring your Mikrotik router. Check out this image we found:

Now, let's break it down step by step so you can easily follow along:
Step 1: Connect to your Mikrotik Router
The first thing you need to do is connect to your router. You can do this by opening up your web browser and typing in the IP address of your router in the URL bar. The default IP address for a Mikrotik router is 192.168.88.1 so make sure that's what you're typing in.
Step 2: Login to Your Mikrotik Router
Once you're connected to your router, you'll be prompted to login. Use the default username and password, which are both "admin" unless you've changed them.
Step 3: Configure your VLANs
Now it's time to configure your VLANs. Navigate to the "Interfaces" section of your router and click on "VLAN".
Step 4: Create a New VLAN
Click on the "Add New" button and create a new VLAN. Assign it a name and number, and set the "interface" to your LAN port.
Step 5: Add Ports to Your VLAN
Once you've created your VLAN, it's time to add ports to it. Navigate to the "Ports" section of your router and click on "VLAN". Find the VLAN you just created and add the appropriate ports to it.
Step 6: Assign IP Address to Your VLAN
Finally, it's time to assign an IP address to your VLAN. Navigate to the "IP" section of your router and click on "Address". Add a new IP address for your VLAN and make sure it's on the same subnet as your other devices.
And that's it! You've successfully configured your Mikrotik router. If you have any other questions or need further assistance, don't hesitate to reach out to us.
We hope this information was helpful and easy to understand. Remember, it's important to regularly check and update your router configuration to ensure your network is secure and running smoothly.


Post a Comment for "MikroTik Router Configuration High Availability Setup"