Exploring Advanced Features Of MikroTik RouterOS Firewall
Have you ever wondered how you can protect your private network from unauthorized access when using a MikroTik RouterOS? Well, you're in luck because in this tutorial we will discuss how to create a private IP firewall to ensure utmost security for your network.
The MikroTik RouterOS is a powerful tool that helps you manage your network with ease. However, without proper security measures, unauthorized access can be easily given to outsiders, posing a security risk to your network.
To create a private IP firewall, you must follow these steps:
Step 1: Add Firewall Filter Rules
The first step is to add firewall filter rules that will define the source, destination, and action to be taken when certain traffic is detected. To add firewall filter rules, follow these steps:
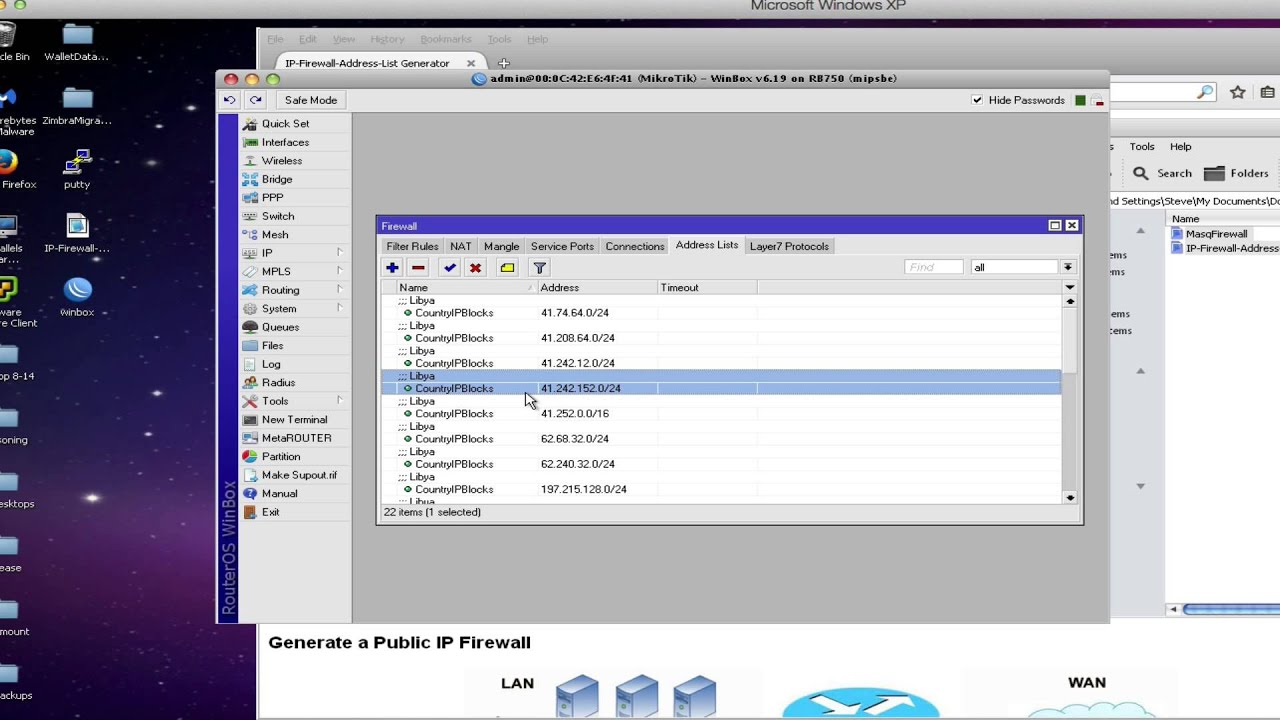
- Log in to your MikroTik RouterOS and navigate to the Firewall tab
- Click on the Filter Rules tab and then click on the Add New button
- Enter a name for the filter rule in the General tab
- In the Source Address field, enter the IP address or range of IP addresses that you want to block access from
- In the Destination Address field, enter the IP address or range of IP addresses that you want to block access to
- Select the action to be taken in the Action tab. You can choose to allow or deny traffic
- Save the filter rule by clicking on the Apply button
Once you have added the firewall filter rules, you can then proceed to the next step.
Step 2: Add Firewall NAT Rules
The next step is to add firewall NAT rules that will allow traffic to pass through your network. To add firewall NAT rules, follow these steps:
- Log in to your MikroTik RouterOS and navigate to the Firewall tab
- Click on the NAT tab and then click on the Add New button
- Enter a name for the NAT rule in the General tab
- In the Protocol field, select the protocol that you want to allow traffic for
- In the Dst. Port field, enter the port number that you want traffic to pass through
- In the Action tab, select the action to be taken. You can choose to allow or deny traffic
- Save the NAT rule by clicking on the Apply button
Once you have added the firewall NAT rules, you can then proceed to the next step.
Step 3: Add Firewall Mangle Rules
The final step is to add firewall mangle rules that will modify traffic as it passes through your network. To add firewall mangle rules, follow these steps:
- Log in to your MikroTik RouterOS and navigate to the Firewall tab
- Click on the Mangle tab and then click on the Add New button
- Enter a name for the mangle rule in the General tab
- In the Protocol field, select the protocol that you want to modify traffic for
- In the Advanced tab, select the IP address or range of IP addresses that you want to modify traffic for
- Modify the traffic as desired in the Action tab. For example, you can modify the TTL value or add a new destination address
- Save the mangle rule by clicking on the Apply button
Once you have added the firewall mangle rules, your private IP firewall is now complete and your network is secure!
By following these three simple steps, you can protect your private network from unauthorized access while using MikroTik RouterOS. With a private IP firewall in place, you can now enjoy peace of mind knowing that your network is safe and secure.


Post a Comment for "Exploring Advanced Features Of MikroTik RouterOS Firewall"