Exploring MikroTik Router Proxy Web Cache And Acceleration
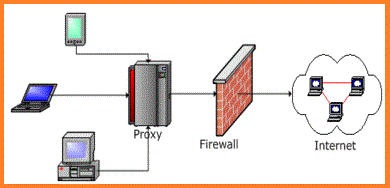
If you're looking to enhance your network security and privacy, setting up a MikroTik Router Web Proxy is definitely worth considering. This type of proxy server filters content requested by clients and caches frequently used files to improve network performance. Let's dive into the details of how you can configure your MikroTik router web proxy to secure your network.
Before You Begin
The first step in setting up your MikroTik Router Web Proxy is logging in to your router’s management interface. Make sure that you have access to your router’s admin credentials, which you can usually find on the back of the router or from your internet service provider. Once you're logged in, make sure that your router is up-to-date with the latest firmware and that you have access to the configuration menu.
Setting Up Your MikroTik Router Web Proxy
Once you have access to your router's configuration menu, navigate to the 'IP' tab and select 'Web Proxy'. This will bring up the 'Web Proxy Settings' page, where you can configure your proxy settings.
Enable Web Proxy
The first thing you need to do is enable the web proxy by setting the 'Enabled' option to 'Yes'. This will turn on the web proxy service on your router. You can also set the 'Port' number for your web proxy if you want to change the default port.
Cache Settings
The cache size settings allow you to choose how much disk space the web proxy is allowed to use for caching files. This will depend on the size of your network and the amount of traffic that you expect to be cached on your router. It is recommended to set the cache size to 2-10GB depending on your network size.
Access Control
The access control tab allows you to create rules to control which clients can access the web proxy service. You can set rules based on IP address, MAC address, and more. It is recommended to set the access control rules to match your network security policy.
Advanced Settings
The advanced settings tab allows you to configure advanced web proxy settings like DNS caching, DNS server settings, and more. Most of the settings are pre-configured for you and don't need to be changed unless you have specific requirements.
Testing Your Web Proxy
After you've configured your MikroTik Router Web Proxy, it's time to test it to see if everything is working correctly. You can check the status of your web proxy by navigating to the 'IP' tab and selecting 'Web Proxy', then from the side menu, select 'Status'. This page will show you whether the web proxy service is running or not.
To test the web proxy, you can open a web browser and set the proxy settings to your router's IP address and the port that you configured for the web proxy. Once you've done this, try browsing some sites and see if the web proxy is filtering content and caching frequently requested files. You can also check the web proxy logs to see if it is working correctly.
Conclusion
Setting up a MikroTik Router Web Proxy is a great way to improve the performance and security of your network. By filtering content requested by clients and caching frequently used files, you can reduce traffic and enhance web performance while limiting access to unwanted content. Follow these simple steps, and you'll be well on your way to setting up a safe and secure web proxy that will work for your network.
If you have any questions or difficulties in configuring your MikroTik Router Web Proxy, please feel free to reach out to your ISP or MikroTik support for assistance.


Post a Comment for "Exploring MikroTik Router Proxy Web Cache And Acceleration"