Proxy Server Authentication Methods And Access Control
Squid Proxy Server is a powerful and flexible open-source web proxy server that can be used for caching and filtering of web content. What sets Squid apart from other proxy servers is its support for Active Directory (LDAP) authentication. In this article, we’ll dive into the Squid Proxy Server Configuration With Active Directory (LDAP).
Prerequisites
Before configuring Squid Proxy Server with Active Directory (LDAP), you need to have the following:
- A Linux server with Squid Proxy Server installed
- An Active Directory (LDAP) server
- User accounts on the Active Directory (LDAP) server
Step-by-Step Configuration
1. Install Required Packages
First, we need to install some required packages on our Linux server:
sudo apt-get update sudo apt-get install squid krb5-user auth-client-configThe squid package installs the Squid Proxy Server, while krb5-user and auth-client-config packages are required for Kerberos authentication.
2. Configure Kerberos Authentication
Next, we need to configure our Kerberos client to communicate with our Active Directory (LDAP) server. Edit the /etc/krb5.conf file:
[libdefaults] default_realm = EXAMPLE.COM dns_lookup_realm = false dns_lookup_kdc = false [realms] EXAMPLE.COM = kdc = AD.EXAMPLE.COM admin_server = AD.EXAMPLE.COM default_domain = EXAMPLE.COM [domain_realm] .example.com = EXAMPLE.COM example.com = EXAMPLE.COMReplace EXAMPLE.COM with your domain name and AD.EXAMPLE.COM with the hostname of your Active Directory (LDAP) server.
3. Configure Squid
Edit the /etc/squid/squid.conf file:
auth_param negotiate program /usr/lib/squid/negotiate_kerberos_auth -s HTTP/proxy.example.com@EXAMPLE.COM auth_param negotiate children 10 auth_param negotiate keep_alive on acl authenticated proxy_auth REQUIRED http_access allow authenticated http_access deny allReplace example.com with your domain name and proxy.example.com with the hostname of your Squid Proxy Server.
Now, restart the Squid Proxy Server:
sudo systemctl restart squid4. Verify the Configuration
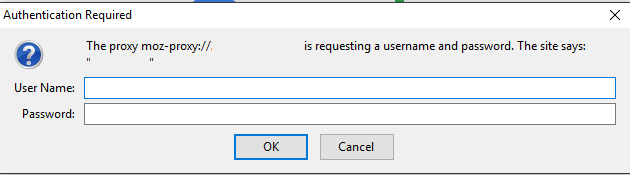
Finally, we need to verify that our Squid Proxy Server is working with Active Directory (LDAP) authentication. Open a web browser and enter the URL of your Squid Proxy Server:
http://proxy.example.com:3128You should see a login prompt. Enter your Active Directory (LDAP) credentials to authenticate:
Username: jdoe Password: *********If everything is configured correctly, you should now be able to browse the web through your Squid Proxy Server with Active Directory (LDAP) authentication!
Conclusion
Configuring Squid Proxy Server with Active Directory (LDAP) authentication can be a bit tricky, but it’s well worth the effort. With this configuration, you’ll have a powerful and flexible web proxy server that can be used for caching and filtering web content while providing secure authentication through your Active Directory (LDAP) server.
So, go ahead and give it a try. You’ll be glad you did!


Post a Comment for "Proxy Server Authentication Methods And Access Control"