Exploring MikroTik RouterOS Interface Bonding For Improved Performance
Are you looking to optimize your network performance for your business or home usage? Mikrotik interface bonding is here to help you achieve just that! Through this innovative solution, you can bond several network interfaces and get the combined bandwidth, enhancing network connectivity and data transfer.
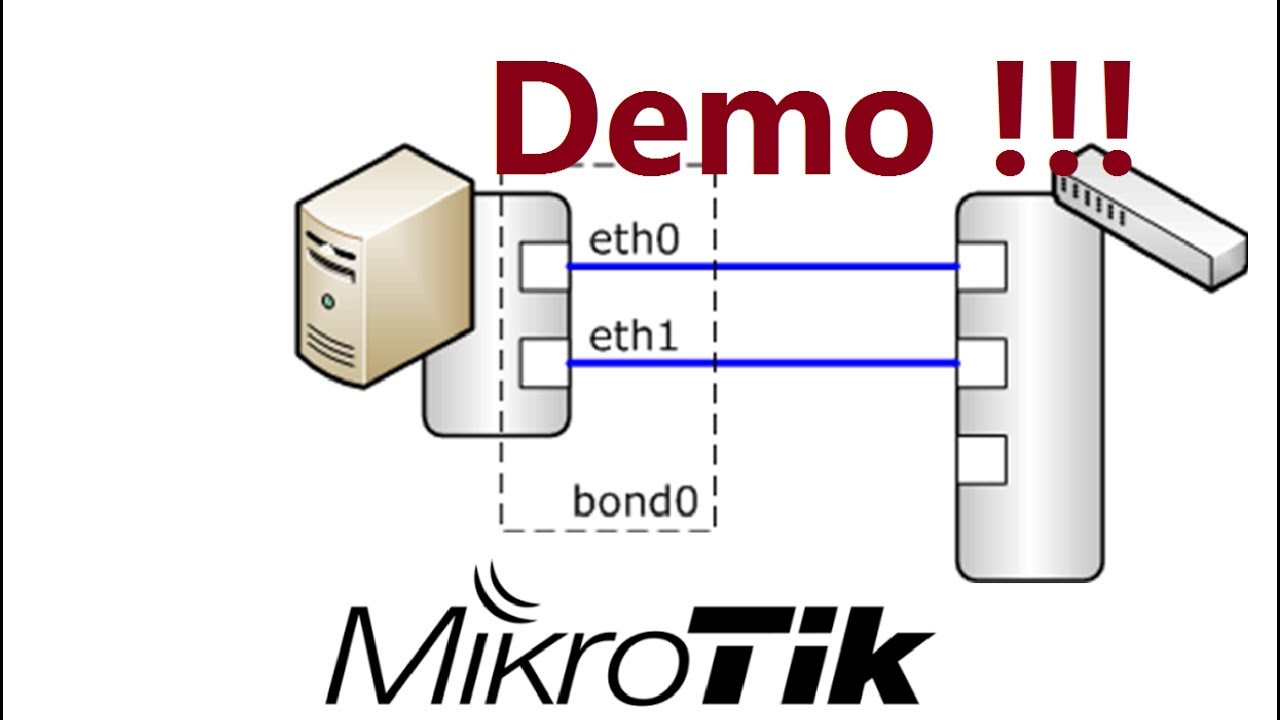
In simple words, interface bonding refers to combining two or more network interfaces into a single virtual interface. This process increases network performance as it allows users to aggregate the bandwidth of multiple interfaces into one virtual interface.
What is Interface Bonding in Mikrotik?
When multiple network interfaces are bonded together, creating a bond interface with a unique name, the bandwidth of all interfaces bonded within this bond interface is combined into one virtual interface.
Mikrotik interface bonding allows users to combine up to eight ethernet interfaces and two 4G LTE modems into a single bond interface. This creates a network with a much higher bandwidth and an improved network performance.
The Benefits of Using Interface Bonding
Interface bonding by Mikrotik is an innovative and effective way to improve network performance in your business or home. Below are some of the benefits:
Increased Bandwidth
Mikrotik interface bonding allows users to combine ethernet interfaces into one virtual interface. This, in turn, increases the bandwidth of your network, giving you a better internet connection speed for faster data transfer.
Load Balancing
Interface bonding can distribute data evenly across multiple network interfaces, which allows for network load balancing. This balancing ensures that no single interface is overloaded with more data than it can handle, which enhances reliability and stability of network connections.
Improved Network Redundancy
With interface bonding, you have redundancy backup as an added advantage. This means that if one of the bonded links fails, the remaining interface automatically takes over. This reduces the risk of network failure and prolongs the lifespan of your hardware.
How to Set Up Mikrotik Interface Bonding
The process of setting up bond interface is quite simple. However, it requires a bit of routerboard configuration. Here are the steps to follow:
Step 1
Log in to your Mikrotik router and click on the ‘Interfaces’ tab.
Step 2
In the ‘interfaces’ tab, create a bonding interface by clicking on the plus icon.
Step 3
Enter a unique name for the bond interface in the ‘name’ field
Step 4
Select the bonding type you want to use in the ‘type’ field. The most common bonding types are LACP (Link Aggregation Control Protocol) and Round-robin.
Step 5
Select the member interfaces you want to bond with the bond interface.
Step 6
Click on the Apply button to finish the process.
Conclusion
If you are looking to improve network performance and optimize data transfer, then Mikrotik interface bonding is your solution. By bonding several network interfaces, you combine their bandwidth and create one virtual interface. This enhances network connectivity, load balancing and network redundancy. Setting up Mikrotik interface bonding requires some routerboard configuration, but it is a straightforward process that can be done quickly. Take advantage of this innovative solution and improve your network performance today!


Post a Comment for "Exploring MikroTik RouterOS Interface Bonding For Improved Performance"