Exploring MikroTik RouterOS Bridge Configuration
If you're looking for a way to improve your network speed and stability, configuring a bridge in your Mikrotik RouterOS is a great way to start! Whether you're a business owner or a home user, a bridge can help you achieve a more efficient and secure network without breaking the bank. In this post, we'll show you how to configure a bridge in your Mikrotik RouterOS, step by step.
Step 1: Accessing your RouterOS
The first thing you'll need to do is access your RouterOS. You can do this by opening your web browser and typing in the IP address of your RouterOS. Once you've entered your IP address, you'll need to log in with your username and password. If you've never accessed your RouterOS before, the default username is "admin" and the default password is blank.
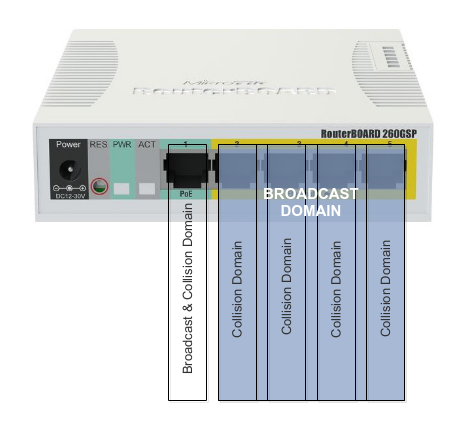
Step 2: Creating a Bridge Interface
Once you've accessed your RouterOS, the next step is to create a bridge interface. A bridge interface allows you to connect multiple networks together. To create a bridge interface, go to "Interfaces" and click on "Bridge." Create a new bridge interface by clicking on the "New Bridge" button. Give your bridge a name and select the interfaces you want to include in your bridge.
Step 3: Configuring your Bridge Interface
Now that you've created your bridge interface, it's time to configure it. To do this, click on your bridge interface and go to the "Bridge" tab. Here, you can configure your bridge settings, such as STP (Spanning Tree Protocol), aging, and other options.
Step 4: Adding Ports to your Bridge Interface
After configuring your bridge interface, the next step is to add ports to your bridge. To add ports, go to the "Ports" tab and click on the "New Port" button. You'll then be prompted to select which interface you want to add to your bridge. Select the interface you want to add and click "ok."
Step 5: Configuring your Bridge Ports
Once you've added ports to your bridge interface, it's time to configure them. To do this, go to the "Port" tab and select the port you want to configure. Here, you can configure settings such as VLAN (Virtual LAN) ID, port priority, and other options.
Step 6: Testing your Bridge
After configuring your bridge interface and ports, the next step is to test your bridge. To do this, you can use a network analyzer tool to monitor your network traffic. Make sure that your network traffic is properly flowing through your bridge and that there are no bottlenecks or other issues.
Conclusion
Configuring a bridge in your Mikrotik RouterOS is a great way to improve your network speed and stability. With the step-by-step guide we've provided in this post, you can easily set up your own bridge and start enjoying the benefits. So what are you waiting for? Give it a try today and see how it can help you achieve a more efficient and secure network!


Post a Comment for "Exploring MikroTik RouterOS Bridge Configuration"