MikroTik Router Configuration Step-by-Step Guide For Beginners
MikroTik routers are a popular choice for network administrators around the world, and for good reason. They are versatile, affordable, and feature-rich, offering a range of advanced networking capabilities in a single device. If you're looking to configure a MikroTik router for your own network, you're in luck. In this post, we'll walk you through the process step by step.
The first step is to access your MikroTik router's web interface. You can do this by opening a web browser and typing in the IP address of your router. This is typically something like 192.168.1.1, but may vary depending on your network setup. Once you've entered the correct IP address, you should see the MikroTik login page.
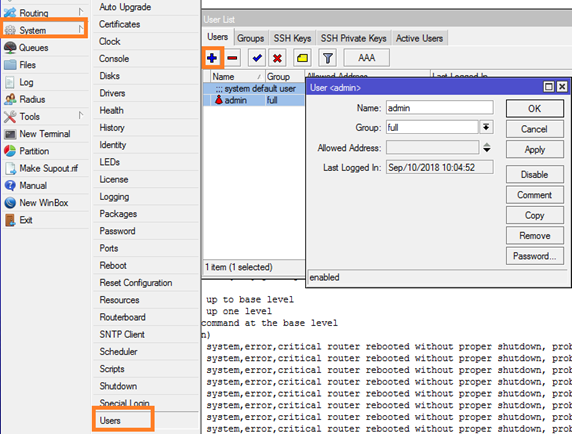
Next, you'll need to enter your login credentials. The default username is "admin" and the default password is blank, so if you haven't changed these yet, you should be able to log in without any issues. However, it's highly recommended that you change the default password as soon as possible for security reasons.
Once you've logged in, you'll be taken to the MikroTik web interface dashboard. From here, you can begin configuring your router to meet your needs.
Basic Configuration
The first thing you'll want to do is configure the basics of your MikroTik router, including the router's hostname, DNS settings, and IP address.
Set the Hostname
The hostname is the name that your router uses to identify itself on the network. By default, MikroTik routers come with a generic hostname like "MikroTik" or "RouterOS". To set a custom hostname, navigate to the "System" menu on the left-hand side of the web interface, then select "Identity" from the drop-down menu. Here, you can enter a new hostname for your router and click "Apply" to save the changes.
Configure DNS
DNS stands for Domain Name System, and it is responsible for translating human-readable domain names like "google.com" into IP addresses that computers can understand. To configure DNS settings on your MikroTik router, navigate to the "IP" menu on the left-hand side of the web interface, then select "DNS" from the drop-down menu. Here, you can enter the IP addresses of your preferred DNS servers, such as those provided by your ISP or a third-party DNS service like Google DNS or OpenDNS.
Set the IP Address
The IP address is the unique identifier that your MikroTik router uses to communicate on the network. By default, MikroTik routers come configured to use the IP address 192.168.88.1. However, you'll want to change this to an IP address that is appropriate for your network. To do so, navigate to the "IP" menu on the left-hand side of the web interface, then select "Addresses" from the drop-down menu. Here, you can enter a new IP address for your router and click "Apply" to save the changes.
Wireless Configuration
If your MikroTik router has a built-in wireless radio, you'll want to configure the wireless settings to match your network setup. This includes setting up the SSID (network name), security settings, and channel selection.
Set the SSID
The SSID is the name that your wireless network uses to identify itself. By default, MikroTik routers come configured with a generic SSID like "MikroTik". To set a custom SSID, navigate to the "Wireless" menu on the left-hand side of the web interface, then select "Interfaces" from the drop-down menu. Here, you can select the wireless interface you want to configure and enter a new SSID in the "SSID" field.
Configure Security Settings
Wireless networks should always be secured to prevent unauthorized access. To configure security settings on your MikroTik router, navigate to the "Wireless" menu on the left-hand side of the web interface, then select "Security Profiles" from the drop-down menu. Here, you can create a new security profile and choose the appropriate security settings, such as WPA2 encryption and a strong password. Then, go back to the "Interfaces" menu and select the wireless interface you want to configure. Under the "Wireless" tab, choose the security profile you just created from the "Security Profile" drop-down menu.
Select the Right Wireless Channel
The wireless channel is the frequency that your wireless network uses to communicate. In crowded areas, it's important to choose the right wireless channel to avoid interference from other networks. To select the right wireless channel on your MikroTik router, navigate to the "Wireless" menu on the left-hand side of the web interface, then select "Interfaces" from the drop-down menu. Under the "Wireless" tab, you'll see an option to select the wireless channel. You can use a tool like Wi-Fi Analyzer to find the least crowded channel in your area.
Routing and Firewall Configuration
Routing and firewall configuration can be a complex topic, but it's essential for ensuring that your network is secure and functioning properly. Below, we've provided a brief overview of some of the basic routing and firewall concepts you'll need to know when configuring your MikroTik router.
Configure NAT
NAT (Network Address Translation) is a technique used to allow multiple devices on a private network to share a single public IP address. To configure NAT on your MikroTik router, navigate to the "IP" menu on the left-hand side of the web interface, then select "Firewall" from the drop-down menu. Here, you can create a new NAT rule that maps your private IP addresses to your public IP address.
Set up Firewall Rules
A firewall is a network security system that monitors and controls incoming and outgoing network traffic. To set up firewall rules on your MikroTik router, navigate to the "IP" menu on the left-hand side of the web interface, then select "Firewall" from the drop-down menu. Here, you can create new firewall rules that specify which types of traffic are allowed and which are blocked. For example, you might create a rule that blocks incoming traffic on a particular port to prevent unauthorized access.
Configure Routing
Routing is the process of directing network traffic between different networks. To configure routing on your MikroTik router, navigate to the "IP" menu on the left-hand side of the web interface, then select "Routes" from the drop-down menu. Here, you can create new routes that specify how traffic should be directed between different networks. For example, you might create a route that directs traffic from your local network to the Internet through your ISP's gateway IP address.
Conclusion
Configuring a MikroTik router can be a challenging task, but with the right knowledge and tools, it can be a highly rewarding experience. By following the steps outlined in this post, you should be well on your way to configuring your MikroTik router to meet your networking needs. Whether you're a small business owner, an IT professional, or a home user, a properly configured MikroTik router can help you achieve reliable, secure, and high-speed connectivity for all of your devices.


Post a Comment for "MikroTik Router Configuration Step-by-Step Guide For Beginners"