Load Balancing And Failover Techniques With MikroTik Router Configuration
Load balancing is a crucial element in any network infrastructure, especially in today's world where businesses rely heavily on the internet. It's important to ensure that your network's resources are utilized efficiently, and that there is no single point of failure. This can be achieved using MikroTik Load Balancing with Failover using Policy Based Routing as it gives you the ability to distribute traffic across multiple links and provide automatic failover in case of link failure.
How does it work?
MikroTik Load Balancing with Failover using Policy Based Routing allows you to create different policies that define how traffic should be treated based on specific criteria. For example, you could create a policy that sends all HTTP traffic to one link and all HTTPS traffic to another link, or you could create a policy that sends traffic to a specific link based on the source IP address.
The policies are created using the MikroTik RouterOS scripting language, which allows you to define very specific rules for how traffic should be handled. You can also specify which interfaces to use for each link that you want to balance traffic across.
The benefits of MikroTik Load Balancing with Failover
Using MikroTik Load Balancing with Failover has a number of benefits:
Increased network reliability
By using multiple links and automatic failover, you can ensure that your network is always available, even if one or more links go down. This can be particularly important for businesses that rely heavily on the internet, as downtime can result in lost productivity and revenue.
Improved network performance
Load balancing allows you to distribute traffic across multiple links, which can help to reduce congestion and ensure that each link is used efficiently. This can result in improved network performance and faster speeds for users.
Reduced costs
Load balancing can help to reduce costs by allowing you to use cheaper links alongside more expensive links. For example, you could use a slower DSL connection alongside a faster leased line, which would reduce costs while still providing high-speed internet access to users.
Setting up MikroTik Load Balancing with Failover using Policy Based Routing
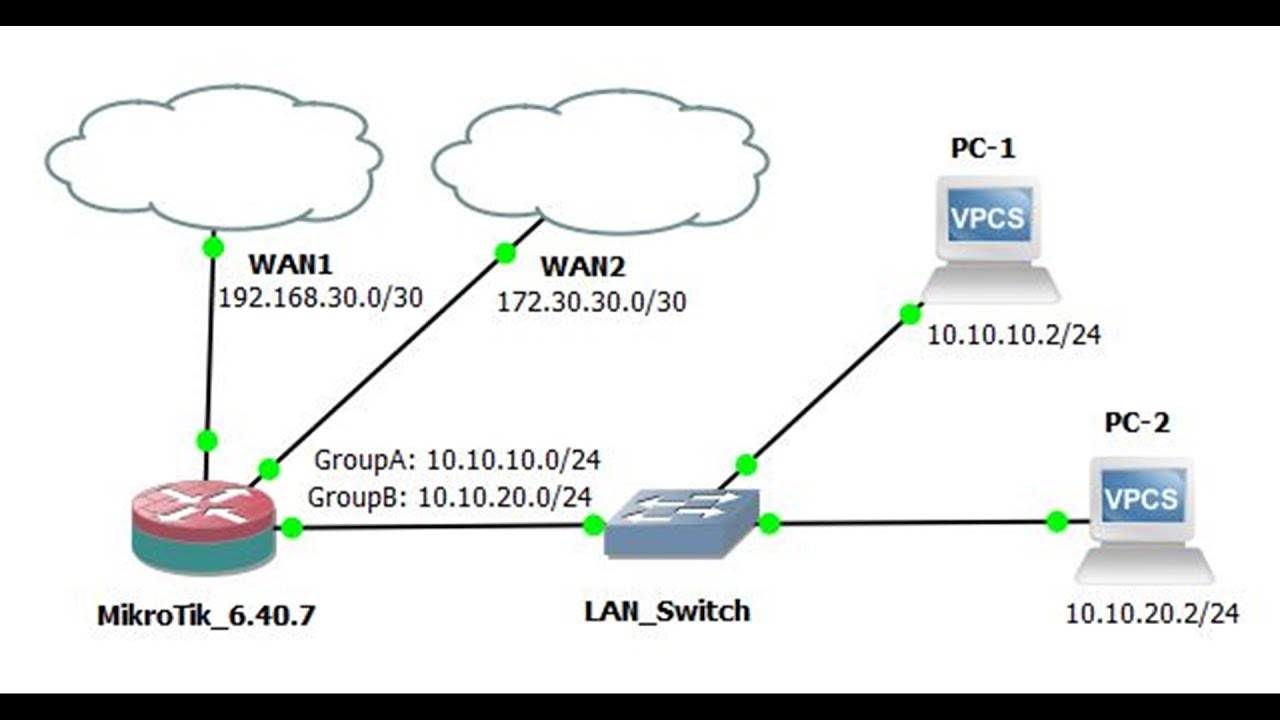
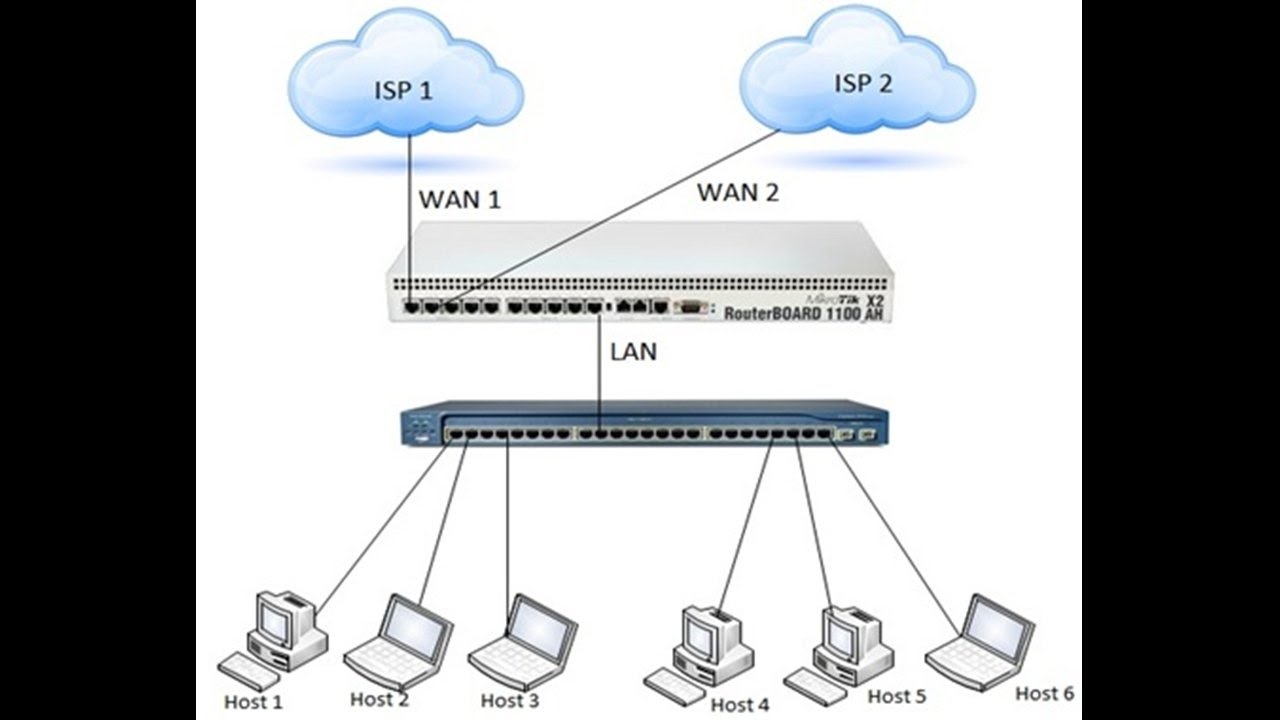
Step 1: Configure your network interfaces
The first step is to configure your network interfaces. You should have at least two interfaces that you want to use for load balancing. These could be two separate physical interfaces, or one physical interface and one virtual interface.
Once you have your interfaces configured, you'll need to assign IP addresses to each interface. These IP addresses will be used to define the source addresses for your load balancing policies.
Step 2: Create your load balancing policies
The next step is to create your load balancing policies. These policies are defined using the MikroTik RouterOS scripting language.
You can create policies that are based on a wide range of criteria, including IP address ranges, protocols, and source ports. For example, you could create a policy that sends all HTTP traffic to one interface and all HTTPS traffic to another interface.
To create a policy, you'll need to use the /ip firewall mangle command. Here's an example:
/ip firewall mangle add action=mark-routing chain=prerouting comment="Load Balancing Policy 1" new-routing-mark=to_WAN1 passthrough=no protocol=tcp src-address=192.168.1.0/24 dst-address=0.0.0.0/0 dst-port=80
This policy sends all HTTP traffic (destined for port 80) from the 192.168.1.0/24 subnet to the WAN1 interface.
You can create multiple policies to handle different types of traffic or to provide redundancy in case one link fails.
Step 3: Configure load balancing and failover settings
The final step is to configure the load balancing and failover settings. This is done using the /ip route command.
You can create routes that specify which interfaces to use for load balancing, and you can also create routes that specify which interfaces to use for failover. Here's an example:
/ip route add check-gateway=ping distance=1 gateway=192.168.1.254 comment="Gateway 1" routing-mark=to_WAN1 add check-gateway=ping distance=2 gateway=192.168.2.254 comment="Gateway 2" routing-mark=to_WAN2 add distance=1 gateway=192.168.1.254 comment="Load Balanced Route" routing-mark=to_both add distance=2 gateway=192.168.2.254 comment="Backup Route" routing-mark=to_both add distance=1 gateway=192.168.1.254 comment="Default Route" table=main
This configuration specifies two gateways (192.168.1.254 and 192.168.2.254) that are used for load balancing. The first gateway is assigned a distance of 1, which means it is the preferred gateway for traffic that matches the to_WAN1 routing mark. The second gateway is assigned a distance of 2, which means it is used only if the primary gateway fails.
The Load Balanced Route and Backup Route routes specify which interfaces to use for load balancing and failover. The Default Route specifies the default gateway for all other traffic.
Conclusion
MikroTik Load Balancing with Failover using Policy Based Routing is an excellent way to improve the performance and reliability of your network while reducing costs. By distributing traffic across multiple links and providing automatic failover, you can ensure that your network is always available and that it's being used efficiently.
Setting up load balancing and failover policies can be complex, but by following the steps outlined above, you'll be well on your way to creating a robust and reliable network infrastructure.


Post a Comment for "Load Balancing And Failover Techniques With MikroTik Router Configuration"