Configuring MikroTik Router As A Reverse Proxy Server
A reliable internet connection is essential for any business, and having a strong network architecture can make all the difference. That's why we're excited to share with you how to enhance your network's reliability and speed with MikroTik Load Balancing over Multiple Gateways!
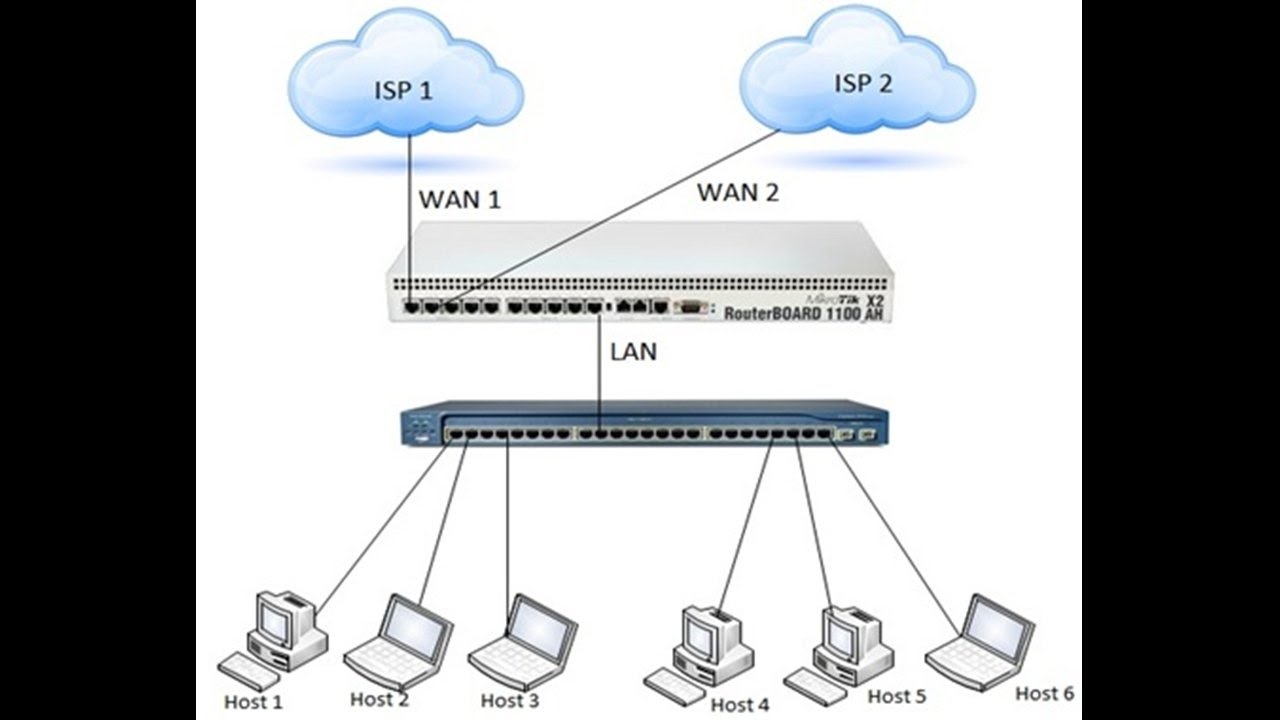
Load balancing is a networking technique used to distribute traffic between multiple network links. MikroTik's implementation of load balancing allows you to balance the incoming traffic between 2 or more gateways, ensuring that each gateway is used to its maximum capacity and reducing the risk of network downtime.
Advantages of MikroTik Load Balancing
The advantages of implementing load balancing on your network are numerous and significant. Here are just a few:
- Increased reliability: By balancing traffic across multiple gateways, you can ensure that your network always has a backup in case of failure.
- Speed: Load balancing ensures that traffic is spread evenly across multiple gateways, maximizing the available capacity and reducing bottlenecks.
- Cost efficiency: By distributing traffic across multiple lower-cost connections, you can achieve a higher level of service at a lower cost than relying on a single, higher-cost connection.
Getting Started with MikroTik Load Balancing
Before you get started with load balancing on MikroTik, there are a few prerequisites that you should be aware of:
- You will need two or more WAN connections.
- You will need a MikroTik RouterOS device with a minimum of 2 Ethernet ports.
Once you have these prerequisites, follow these steps:
Step 1: Configure the WAN connections
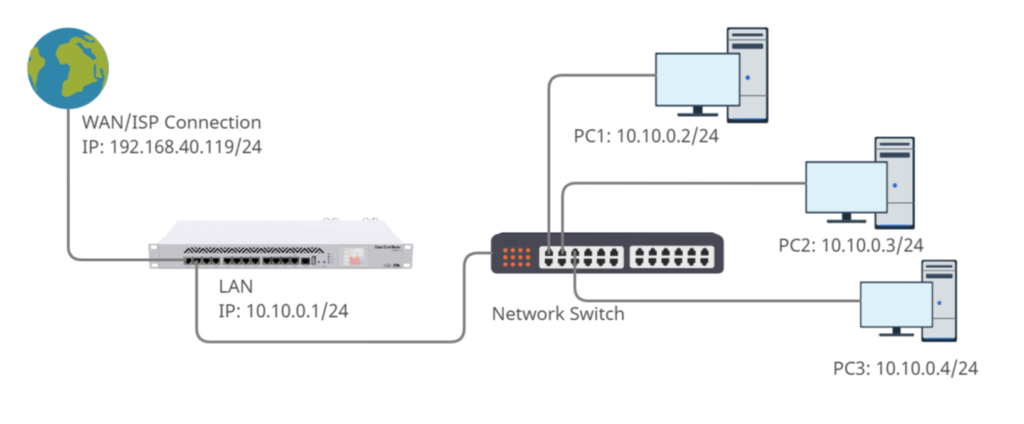
The first step is to configure your WAN connections. Connect your WAN connections to the Ethernet ports on your MikroTik RouterOS device, and configure your WAN connection settings. You can do this by going to IP -> Addresses in your MikroTik interface, and adding the IP addresses of your WAN connections.
Step 2: Create the load balancing pool
The next step is to create a load balancing pool. A load balancing pool is a group of gateway interfaces that you want to use for load balancing. To create a load balancing pool, follow these steps:
- Go to IP -> DHCP Server in your MikroTik interface.
- Click on the Load Balancing tab.
- Click the Add button to create a new pool.
- Name your pool.
- Select the WAN interfaces that you want to include in the pool. You can select more than one WAN interface by holding down the Ctrl key while clicking.
- Click OK to create the pool.
Step 3: Configure the load balancing rules
The final step is to configure the load balancing rules. Load balancing rules determine how traffic is distributed between the gateways in the load balancing pool. To create a load balancing rule, follow these steps:
- Go to IP -> Firewall in your MikroTik interface.
- Click on the NAT tab.
- Click the Add New button to create a new NAT rule.
- Set the chain to src-nat.
- Set the out-interface-list to your load balancing pool.
- Click OK to create the rule.
And that's it! You should now have a load-balanced network architecture that distributes traffic across multiple gateways, ensuring maximum reliability and speed.
Conclusion
By implementing MikroTik Load Balancing over Multiple Gateways, you can achieve a more reliable and faster internet connection for your business. Load balancing ensures that traffic is distributed across multiple gateways, maximizing capacity and reducing the risk of network downtime. By following our steps, you can start reaping the many benefits of load balancing today!


Post a Comment for "Configuring MikroTik Router As A Reverse Proxy Server"