Enhancing Web Browsing Speed With MikroTik Router Proxy
Have you heard of Mikrotik Router Web Proxy Configuration? It is a powerful tool that allows you to set up a transparent proxy server that helps you manage your network traffic and improve your internet performance. Today, we are going to dive deep into this topic and give you a comprehensive guide on how to configure a Mikrotik Router Web Proxy.

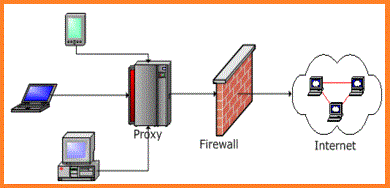
First, let's define what a transparent proxy server is. A transparent proxy is a server that intercepts all incoming and outgoing traffic on a network and forwards it to the internet. It does this without requiring any configuration on the client's devices. In a transparent proxy setup, the client's devices are unaware of the proxy server, and the server appears as a regular web server to them.
Now that we have understood what a transparent proxy is, let's move on to the steps required to configure a Mikrotik Router Web Proxy.
Step 1: Configuring the Web Proxy
The first step is to configure the Web Proxy on your Mikrotik Router. Here are the steps:
- Log in to your Mikrotik Router using the Winbox utility.
- Navigate to the IP tab on the left-hand side and select Web Proxy from the drop-down menu.
- Click the Settings button. This will open the Web Proxy Settings window.
- Enable the Web Proxy by checking the Enabled checkbox.
- Set the Port number to 8080 (or any other port that you prefer).
- Set the Maximum Cache Size to a value that matches your available disk space. For example, if you have 100 GB of disk space available, you can set the Maximum Cache Size to 50 GB. This will allow the Web Proxy to use up to 50 GB of disk space to store cached web pages.
- Set the Cache On Disk option to "yes."
- Click the OK button to save your settings.
Step 2: Configuring DNS
Once you have configured the Web Proxy, you need to configure your DNS settings to use the Mikrotik Router as your DNS server. Here are the steps:
- Log in to your Mikrotik Router using the Winbox utility.
- Navigate to the IP tab on the left-hand side and select DNS from the drop-down menu.
- Click the Settings button. This will open the DNS Settings window.
- Enable the DNS Server by checking the Enabled checkbox.
- Set the Allow Remote Requests option to "yes."
- Click the Apply button to save your settings.
Step 3: Creating NAT Rule
Next, you need to create a NAT rule that will redirect all outgoing traffic to the Web Proxy. Here are the steps:
- Log in to your Mikrotik Router using the Winbox utility.
- Navigate to the IP tab on the left-hand side and select Firewall from the drop-down menu.
- Select the NAT tab at the top of the window.
- Click the + button to add a new NAT rule.
- Set the Chain option to "srcnat."
- Set the Protocol option to "tcp."
- Set the Src. Address option to "0.0.0.0/0"
- Set the Dst. Port option to "80."
- Click the Action tab.
- Select the Action option as "Redirect."
- Set the To Ports option to "8080."
- Click the OK button to save your settings.
Step 4: Testing the Web Proxy
Once you have completed these steps, you can test your Web Proxy to see if it is working correctly. Here are the steps:
- Open a web browser on a client device connected to your network.
- Type in any website address you wish to visit.
- The Web Proxy will display the requested web page. You should be able to see the URL of the Web Proxy in the address bar.
That's it! You have successfully configured a Mikrotik Router Web Proxy. Now you can enjoy faster internet speeds and better network performance.
Conclusion
The Mikrotik Router Web Proxy is an excellent tool for managing network traffic and improving internet performance. With this guide, you can easily set up a Web Proxy on your Mikrotik Router and start reaping the benefits immediately.
We hope that this guide has been helpful to you. If you have any further questions or would like to learn more about Mikrotik Router Web Proxy Configuration, feel free to reach out to us. We are always here to help.


Post a Comment for "Enhancing Web Browsing Speed With MikroTik Router Proxy"