Configuring MikroTik Router As An Efficient Proxy Server
In today’s world, internet security is of utmost importance. Every day we see data breaches and cyber attacks happening around us. The Internet is a vast network of computers and servers that exchange a tremendous amount of data every second. Any device connected to the internet is vulnerable to these attacks. One such attack is the Web Proxy attack. In this article, we will be discussing how to configure Mikrotik Router Web Proxy to enhance online security.

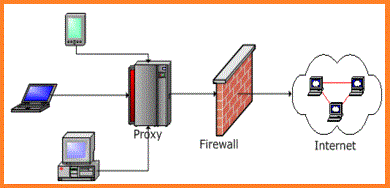
Mikrotik Router is one of the most popular and powerful routers available in the market. It can be configured to implement web proxies to add another level of security to your network infrastructure. Web proxies act as an intermediary between the client and the server, providing an added layer of security by filtering out malicious traffic on behalf of the client. This is helpful since malware, viruses, and phishing attacks can use HTTP and HTTPS protocols to enter a network environment, but with the help of web proxies, you can easily filter out these malicious attacks.
In this guide, we provide a step-by-step process to configure Mikrotik Router Web Proxy.
Steps to Configure Mikrotik Router with Web Proxy:
Step 1: Configure Mikrotik IP Address
The first step is to configure the IP address for the router. Ensure that your computers are connected to the router’s LAN port. Go to IP > Addresses and add a new IP address for the router, and set the subnet mask as per your network configuration.
Step 2: Create a Pool for Proxy Ips
After configuring the IP address, create a pool for proxy IP addresses. This can be accomplished by navigating to IP > Pools and adding a new pool with the pool name, address prefix, and ranges. Once done, click on OK to create the pool.
Step 3: Add DHCP Server in Mikrotik Router
The next step is to add the DHCP server in Mikrotik Router. DHCP (Dynamic Host Configuration Protocol) automatically assigns IP addresses to client devices within a network. This simplifies the management of IP addresses in a network environment and ensures that no two devices are assigned the same IP address.
To add the DHCP server, go to IP > DHCP Server and click on DHCP Setup. This will launch the DHCP Setup Wizard. Select the LAN interface on the Mikrotik Router and continue with the wizard to set up the DHCP server.
Step 4: Configure Mikrotik Router Web Proxy
The next step is to configure the web proxy in Mikrotik Router. To do this, go to IP > Web Proxy and click on the Settings tab.
Enable the Web Proxy by clicking on the Enable Web Proxy checkbox.
Set the Proxy port to ‘8080’.
Select cache administrator email address and provide your email address.
Select Cache size and provide the desired disk size in MB.
After configuring the above settings, click on the ACL tab to create access control lists for the Web Proxy.
Step 5: Creating Access Control List (ACL)
The ACL defines the restriction and permission for a client to access the internet. This is useful since certain websites may contain malicious elements that can harm your network environment. Access control lists serve as a filter to prevent these harmful elements from entering your network environment.
To create an ACL, go to IP > Web Proxy and click on the ACL tab. Click on the Add New button to create a new ACL.
Configure the name of the ACL, and then select the connection type as HTTP, HTTPS, or both.
After configuring the connection type, enter the list of websites. You can specify URLs or IP address subnets or individual IPs. This will allow or block access to these sites when accessed by the client browser.
After creating the ACL, click on the Apply button to apply the changes.
Step 6: Configure NAT
To allow the clients to connect to the internet, we need to configure NAT. NAT (Network Address Translation) assigns a unique IP address to each client device to communicate with the internet.
To configure NAT, go to IP > Firewall and click on the NAT tab. Click on the Add New button to create a new NAT rule.
Select the connection type, i.e., WAN. Configure the action as masquerade and select the out interface as LAN.
After configuring the NAT rule, click on the Apply button to apply the changes.
Step 7: Create Firewall Rule
After configuring NAT, create a firewall rule to prevent the client from accessing restricted sites. This is done to ensure the client adheres to the ACL we created earlier.
To create a firewall rule, go to IP > Firewall and click on the Filter Rules tab. Click on the Add New button to create a new rule.
Select the forward chain option, select the connection type and then select the action action as ‘accept’ or ‘reject’ for the allowed and blocked sites, respectively.
After configuring the firewall rule, click on the Apply button to apply the changes.
Congratulations! You have successfully configured the Mikrotik Router Web Proxy. With these settings in place, your network environment will now be more secure, and you can filter out malicious traffic, keep your network performance optimum, and restrict access to restricted sites.
Conclusion
Mikrotik Router is a powerful and flexible router that offers a wide variety of features to enhance your network security. Configuring a web proxy on the Mikrotik Router is a simple but effective way of adding an extra layer of security to your network. By following the above steps, you can easily configure the Mikrotik Router Web Proxy and protect your network from malicious traffic and cyber attacks. Take the necessary steps to ensure your network remains secure to safeguard against cyber threats.


Post a Comment for "Configuring MikroTik Router As An Efficient Proxy Server"