Understanding VPN Protocols For MikroTik Devices
If you're looking to connect with your remote clients and have been wondering how to configure a MikroTik VPN, then this post is for you!

Here is a step-by-step guide on how to setup your MikroTik VPN server with PPTP:
Step 1: Open Your MikroTik RouterOS Terminal
Log in to your MikroTik RouterOS using your web browser. Once you're in, open the RouterOS terminal from the menu on the left side of the screen.
Step 2: Configure the MikroTik VPN Server
There are several important configuration settings you'll need to set up on your MikroTik VPN server:
2.1 Set the IP Address
The first thing you need to do is set the IP address. To do this, you'll need to follow these steps:
- Click on the IP tab from the left-hand menu, then click on an IP address where you want to add the PPTP VPN server.
- Click on the PPP tab from the top menu, and then click on the PPTP Server button.
- In the PPTP Server window, you'll need to set the server configuration. First, enable the PPTP server by checking the box on the left side of the screen.
- Choose a name for the PPTP server and enter it in the Service Name field.
- Enter the IP address for the local address, or the IP address for the VPN server.
- Enter the IP address for the remote address. This should be an unused address on your local network.
- For the IP pool, enter a range of IP addresses that can be used by clients who connect to the VPN server.
- Once you've completed all the necessary configurations, you can click on the Apply button to save your changes.
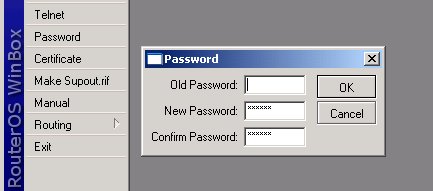
2.2 Create a User
The next step is to create a user who will be able to connect to the VPN server. To do this, follow these steps:
- Click on the PPP tab from the top menu, and then click on the PPTP Server button.
- In the PPTP Server window, click on the Secrets button.
- You'll be prompted to enter a new username and password. Enter the desired username and password in their respective fields, and then click on the OK button.
- Once you've created the user, you can click on the Apply button to save the changes.
Step 3: Configure the VPN Client
Now that your MikroTik VPN server is set up, you'll need to configure the VPN client on your remote device. Here's how:
3.1 Install the VPN Client Software
The first thing you need to do is install the VPN client software on your remote device. You can find MikroTik VPN client software on the MikroTik website.
3.2 Configure the VPN Connection
Once you've installed the client software, it's time to configure the VPN connection:
- Open the VPN client software you just installed on your remote device.
- Create a new connection by clicking on the New button.
- In the new connection window, select PPTP for the connection protocol.
- Enter the IP address for your VPN server in the Server Address field.
- Enter your username and password in the appropriate fields.
- You can also choose to enable encryption if you wish.
- Click on the Connect button to establish the VPN connection.
Step 4: Test the Connection
Once you've set up both the MikroTik VPN server and the VPN client on your remote device, it's time to test the connection. Here's how:
- Open a web browser on your remote device.
- Visit a website that you normally can't access from your remote location.
- If you're able to access the website, that means the VPN connection has been established successfully.
Conclusion
Setting up a MikroTik VPN server and connecting to it remotely might seem like a daunting task, but by following the steps in this guide, you should be able to get it done without too much trouble. By setting up your VPN server, you'll be able to easily connect with your clients who are located remotely, and ensure that your communications are secure and encrypted.
If you have any issues, errors, or concerns with the setup process, you can find plenty of useful resources online, or you can reach out to the MikroTik support team for assistance.
Happy configuring!


Post a Comment for "Understanding VPN Protocols For MikroTik Devices"