Web Filtering Best Practices Enhancing Security With MikroTik Router Proxy
Well well well, look what we have here! Another day, another adventure in Mikrotik-land. Are you ready to dive into the confusing and mysterious world of IP/Proxy? Buckle up, kiddos, because this is going to be a wild ride.
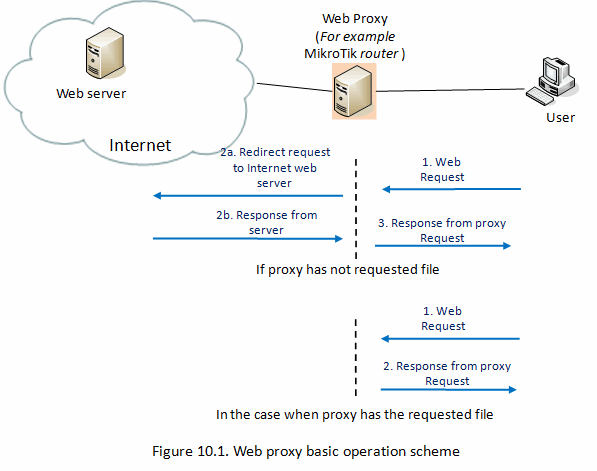
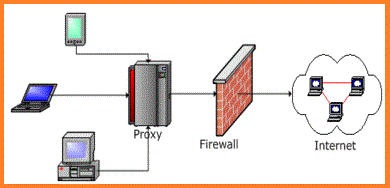
First, let's talk about what IP/Proxy actually is. In layman's terms, it's like a middleman between your device and the internet. It acts as a buffer, filtering and caching all the internet traffic that comes through. It's like a bouncer at a club, deciding who gets in and who gets left outside in the cold.
But why might you want to use IP/Proxy? Well, for one, it can help speed up your internet browsing. By caching frequently accessed websites and files, it can reduce the amount of time it takes for them to load. Plus, it can also block certain websites or types of traffic, allowing you to control what can and cannot be accessed on your network.
So, how do you get started with IP/Proxy on your Mikrotik router? First, you'll need to enable the service. This can be done by going to IP > Proxy in your router's interface and checking the box next to "Enabled".
Next, you'll want to configure the proxy settings to your liking. This includes setting the cache size, specifying which interfaces to use for proxying, and setting up access control rules. It's important to be careful with these settings, as they can greatly affect the performance and security of your network.
But wait, there's more! Let's dive into some nitty-gritty details about IP/Proxy. Did you know that there are two different modes you can use: transparent and non-transparent? Transparent mode automatically intercepts and proxies all HTTP requests, while non-transparent mode requires clients to explicitly configure their proxy settings.
Another important feature of IP/Proxy is caching. By default, cached files are stored in RAM, but you can also configure them to be stored on a separate hard drive if needed. You can also set up cache access lists to control what can and cannot be cached.
Now, onto some tips and tricks for using IP/Proxy effectively. One thing to keep in mind is that proxying HTTPS traffic is a bit more complicated than HTTP traffic. Because HTTPS is encrypted, the proxy must act as a "man-in-the-middle" and decrypt the traffic before re-encrypting it and sending it along. This can introduce security risks, so it's important to use caution if you do decide to proxy HTTPS traffic.
If you're using the transparent proxy mode, you may experience issues with some websites or applications that don't play well with proxies. In these cases, you may need to switch to non-transparent proxy mode or disable the proxy altogether for those clients.
Finally, let's wrap up with some frequently asked questions about IP/Proxy on Mikrotik routers. One common question is whether or not IP/Proxy can be used with VPN connections. The answer is yes, but it can be tricky to set up properly. You'll need to make sure that the VPN clients are set up to use the proxy and that the proxy is configured to handle VPN traffic.
Another question is whether or not IP/Proxy can be used to block specific websites or types of traffic. The answer, once again, is yes! You can set up access control rules to block specific websites or types of traffic based on various criteria like IP address or URL.
Well, folks, that's all we have time for today. We've covered the basics of IP/Proxy on Mikrotik routers, some important details and tips, and even some frequently asked questions. We hope that this has been helpful for you in your quest for internet domination!

Post a Comment for "Web Filtering Best Practices Enhancing Security With MikroTik Router Proxy"