Securing MikroTik RouterOS With VPN And Firewall
If you're looking to establish a secure and reliable VPN connection between a Mikrotik (RouterOS v6.47) and a Vigor Router, you're at the right place! In this guide, we've provided a step-by-step approach to help you set up an IPsec VPN connection between the two devices.
What is IPsec VPN?
IPsec (Internet Protocol Security) VPN is a protocol used to establish a secure connection between two devices over an unsecured network such as the internet. The connection is encrypted, ensuring that any data transmitted over the network is secure and private. IPsec VPN is commonly used by organizations to connect remote employees to the company's network, or by individuals to secure their internet connection while accessing public Wi-Fi hotspots or browsing the internet.
Configuring the Mikrotik RouterOS
The first step in establishing an IPsec VPN connection between the Mikrotik RouterOS and Vigor Router is configuring the Mikrotik RouterOS.
Step 1: Configure the IP addresses
Ensure that both routers are updated and running the latest firmware. Then, configure the IP addresses of the Mikrotik RouterOS and Vigor Router by following these steps:
- Log in to the Mikrotik RouterOS.
- Click on IP from the left menu and then select Addresses.
- In the table that appears, click on the Add button to add a new IP address.
- Add an IP address for the network interface that will be used to connect to the internet (usually ether1) and another IP address for the VPN interface (for example, vpn-mikrotik). The VPN interface IP address should be in a different subnet from the internet interface IP address.
- Click on OK to save the changes.
Step 2: Configure the IPsec policy
The next step is to configure the IPsec policy for the Mikrotik RouterOS by following these steps:
- Log in to the Mikrotik RouterOS.
- Click on IP from the left menu and then select IPsec.
- In the IPsec Peer tab, click on the Add New button to create a new policy.
- Set the name of the policy and select the remote address, which is the IP address of the Vigor Router. Also, select the proposal used for encryption and authentication. The Mikrotik RouterOS supports multiple proposals, and you can select the one that best suits your needs.
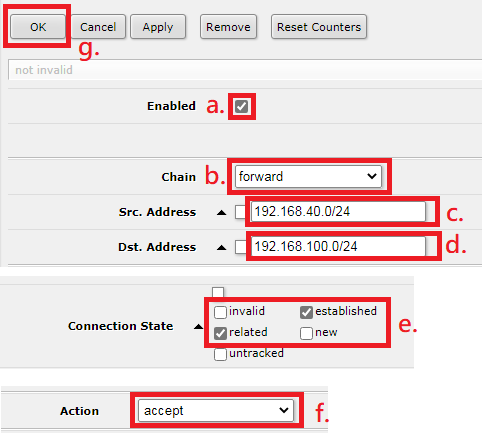
- In the Policy tab, create a new policy by clicking on the Add New button. This policy defines the parameters of the VPN connection. Enter the source and destination IP addresses and select the proposal used for encryption and authentication. Also, specify the VPN interface that was created earlier.
- Click on OK to save the changes.
Step 3: Enable the VPN connection
The final step in configuring the Mikrotik RouterOS is to enable the VPN connection by following these steps:
- Log in to the Mikrotik RouterOS.
- Click on IP from the left menu and then select IPsec.
- Select the new policy that you created.
- Click on the Enable button to enable the VPN connection.
Configuring the Vigor Router
After configuring the Mikrotik RouterOS, the next step is to configure the Vigor Router.
Step 1: Configure the IP addresses
Ensure that both routers are updated and running the latest firmware. Then, configure the IP addresses of the Vigor Router and Mikrotik RouterOS by following these steps:
- Log in to the Vigor Router.
- Click on LAN from the left menu and then select General Setup.
- Configure the IP address of the Vigor Router for the network interface that will be used to connect to the internet (usually WAN1) and another IP address for the VPN interface (for example, vpn-vigor). The VPN interface IP address should be in the same subnet as the VPN interface IP address of the Mikrotik RouterOS.
- Click on OK to save the changes.
Step 2: Configure the IPsec policy
The next step is to configure the IPsec policy for the Vigor Router by following these steps:
- Log in to the Vigor Router.
- Click on VPN and Remote Access from the left menu and then select IPsec General Setup.
- Click on the Add button to create a new policy.
- Set the Name of the policy and select the Remote Gateway, which is the IP address of the Mikrotik RouterOS. Also, select the proposal used for encryption and authentication. The Vigor Router supports multiple proposals, and you can select the one that best suits your needs.
- In the Policy tab, set the local IP address range of the Vigor Router and the IP address range of the Mikrotik RouterOS.
- Click on OK to save the changes.
Step 3: Enable the VPN connection
The final step is to enable the VPN connection by following these steps:
- Log in to the Vigor Router.
- Click on VPN and Remote Access from the left menu and then select Connection Management.
- Click on the Enable button to enable the VPN connection.
Testing the VPN Connection
After configuring both the Mikrotik RouterOS and Vigor Router, you can test the VPN connection by following these steps:
- Log in to the Mikrotik RouterOS and the Vigor Router.
- Check the status of the VPN connection. In the Mikrotik RouterOS, the connection status can be viewed by clicking on IP from the left menu and then selecting IPsec. In the Vigor Router, the connection status can be viewed by clicking on VPN and Remote Access from the left menu and then selecting Connection Management.
- If the connection status is enabled, you can access the network resources of the remote device. To test the connection, try accessing a remote network resource.
That's it! You've successfully established an IPsec VPN connection between the Mikrotik RouterOS and Vigor Router. The VPN connection is secure and private, ensuring that any data transmitted over the network is encrypted and cannot be intercepted by unauthorized parties. If you face any issues during the configuration process, ensure that both routers are updated to the latest firmware, and the configuration settings are correct.


Post a Comment for "Securing MikroTik RouterOS With VPN And Firewall"