MikroTik RouterOS VPN Troubleshooting Common Issues And Solutions
The MikroTik router is an essential piece of hardware that is used by many businesses and individuals to ensure that their network is running smoothly and efficiently. Configuring your MikroTik router can be a daunting task, but don't worry, we're here to help. In this post, we will guide you through the process of configuring your MikroTik router and provide you with useful tips to help optimize your network performance.
First Steps
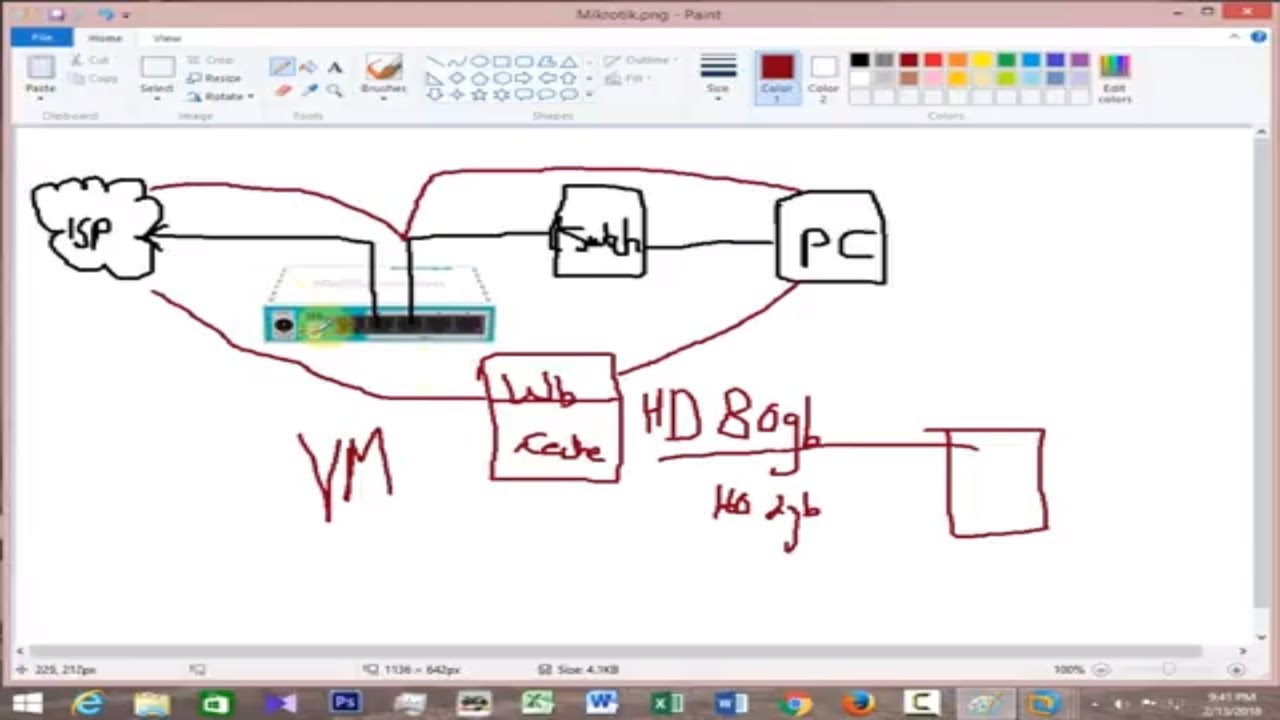
Before you begin configuring your MikroTik router, it is important that you have a basic understanding of what a router is and how it works. A router is a device that is used to connect two or more networks together and manages the traffic between them. When you type a URL into your web browser, your computer sends a request to the router to access the website. The router then sends the request to the internet and receives a response, which it sends back to your computer.
The first step in configuring your MikroTik router is to log into the device. Open your web browser and type in the router's IP address. The default IP address for MikroTik routers is 192.168.88.1. If you're unsure what your router's IP address is, you can find it in the user manual or by doing a quick online search.
Once you've logged into your router, you'll be presented with the router's configuration menu. From here, you can start configuring your router.
Configuring Your MikroTik Router
Configuring your MikroTik router can seem like a daunting task, but by following these steps, you'll be able to get your network up and running in no time.
Step 1: Set Up Basic Configuration
The first step in configuring your MikroTik router is to set up the basic network configuration. This includes setting up your router's IP address, gateway, and DNS settings.
To set up your router's IP address, navigate to the IP > Addresses menu. Here, you'll see a list of all the interfaces on your router. Click the plus (+) icon to add a new IP address. Enter the IP address you want to assign to your router and select the interface you want to use. Click OK to save your changes.
Next, you'll need to set up the gateway. Navigate to the IP > Routes menu and click the plus (+) icon to add a new route. Enter the IP address of your gateway in the Gateway field and select the interface you want to use. Click OK to save your changes.
Finally, you'll need to set up your DNS settings. Navigate to the IP > DNS menu and click the Setttings tab. Here, you can enter the IP addresses of your preferred DNS servers. Click OK to save your changes.
Step 2: Set Up DHCP
Dynamic Host Configuration Protocol (DHCP) is a protocol that automatically assigns IP addresses to devices on your network. Setting up DHCP on your MikroTik router can help make managing your network easier by automatically assigning IP addresses to devices that connect to your network.
To set up DHCP, navigate to the IP > DHCP Server menu. Click the DHCP Setup button and enter the IP address range you want to use for your DHCP pool. You can also set up additional options, such as DNS servers and lease times. Click OK to save your changes.
Step 3: Firewall Configuration
The firewall on your MikroTik router helps protect your network by blocking unwanted traffic. To configure your firewall, navigate to the IP > Firewall menu. Here, you can set up rules to allow or deny traffic. You can also configure NAT (Network Address Translation) settings to translate internal IP addresses to external IP addresses.
It is important to have a good understanding of firewall rules and NAT settings before configuring them. Refer to the MikroTik documentation for more information on how to configure your firewall and NAT settings.
Step 4: Wireless Configuration
If you're using a wireless router, you'll need to configure your wireless settings. To do this, navigate to the Wireless menu. Here, you can set up your wireless network name, security settings, and other options.
It is important to ensure that your wireless security settings are set up correctly to protect your network from unauthorized access.
Step 5: Monitoring and Logging
Monitoring and logging are important for ensuring that your network is running smoothly and for troubleshooting issues when they arise. To monitor your network, navigate to the Tools > Graphing menu. Here, you can view graphs of your router's resource usage.
You can also view logs of network activity by navigating to the System > Logging menu.
Conclusion
Configuring your MikroTik router can be a daunting task, but by following these steps, you'll be able to get your network up and running in no time. It is important to ensure that your network is configured correctly to ensure that it is running smoothly and efficiently.
If you're unsure about any of the steps in this guide, refer to the MikroTik documentation or consult with a network professional. With the right configuration and the right tools, your MikroTik router can help ensure that your network is running at its best.


Post a Comment for "MikroTik RouterOS VPN Troubleshooting Common Issues And Solutions"