Maximizing Bandwidth Efficiency With MikroTik Router Queues
Bandwidth control is an essential aspect of network management to ensure that users do not experience slow internet speeds or excessive data hogging by certain applications or individuals. MikroTik routers are a popular choice for this purpose, and in this post, we will take a step-by-step approach to guide you through the process of implementing Mikrotik queue to control your bandwidth. Before we dive into the details, let us understand what Mikrotik queue is and how it functions. A Mikrotik queue is essentially a method of traffic management that allows you to control the amount of bandwidth consumed by various users or applications. You can prioritize certain applications or users over others, cap bandwidth usage, or limit data transfer rates to ensure a fair distribution of network resources. Now that we have a basic understanding of what Mikrotik queue is let us delve further into the steps required to implement it with your MikroTik router. Step 1: Log in to your MikroTik router The login credentials for your MikroTik router are essential to access the router's control panel. Enter your login credentials to log in. Step 2: Navigate to the queue menu Once you have entered the control panel, navigate to the queue menu, which is located under the IP tab. Step 3: Create a default queue A default queue is required to ensure that any unmatched traffic is handled appropriately, preventing any blockage of traffic. Click on the create button to create a new queue, and enter the following values in the queue settings: - Type of queue: pcq - Default: Checked - Name: default - Max limit: Enter your desired maximum bandwidth limit Once you have entered these values, click on OK to save the settings. Step 4: Create a new queue type The next step is to create a new queue type, which you can use to prioritize certain applications or users over others. To do this, navigate to the Queue Types tab, which is located under the Queue menu. Click on the Add button to create a new queue type, and enter the following values: - Name: Choose a name for the new queue type - Kind: Choose the kind of queue type - e.g., pcq, sfq, etc. - Priority: Enter a priority value between 1-8 to determine the importance of the queue type - Max limit: Enter your desired maximum bandwidth limit Save the new queue type by clicking on OK. Step 5: Create a new queue Now that we have created a default queue and a new queue type, we can proceed to create a new queue that will apply the new queue type to specific users or applications. To do this, navigate to the Queues tab under the Queue menu and click on the Add button to create a new queue. Enter the following values: - Name: Choose a name for the new queue - Target: Choose the target for the queue, which could be an IP address, a subnet, or a specific application - Queue type: Choose the new queue type that we created in step 4 - Max limit: Enter your desired maximum bandwidth limit Click on OK to save the new queue. Step 6: Test the new queue Once you have created a new queue, you can test if it is working correctly by running a bandwidth test on your network. You can run a test by downloading or uploading a large file and monitoring the data transfer rate. If you notice that the queue is not functioning as intended, you can adjust the settings in the queue type or the queue and run the test again until you achieve the desired result. In conclusion, implementing Mikrotik queue to control your bandwidth is a highly effective way of ensuring a fair distribution of network resources and maximizing the efficiency of your network. By following the steps outlined in this post, you can easily set up a Mikrotik queue and customize it to suit your specific needs. Remember to test the queue regularly to ensure that it is functioning correctly, and make adjustments as required. With Mikrotik queue, you can manage your network with ease and avoid the frustrations of slow internet speeds or uneven data distribution. 


mikrotik router bandwidth management simple queues
bandwidth mikrotik queue
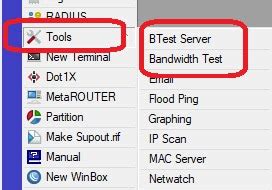
bandwidth test mikrotik named knowledge area server client built link also available


Post a Comment for "Maximizing Bandwidth Efficiency With MikroTik Router Queues"