Securing Remote Access Configuring VPN On MikroTik
So, my dear fellow tech enthusiasts, I recently stumbled upon this hilarious yet oh-so-easy way to configure your Mikrotik L2tp VPN for remote clients. And let me tell you, it'll make you feel like a tech genius. No more banging your head against the wall trying to figure out how to set up remote access. The solution is right here. And lucky for you, I'm going to explain it all in detail. So hold onto your hats folks, and let's get started.

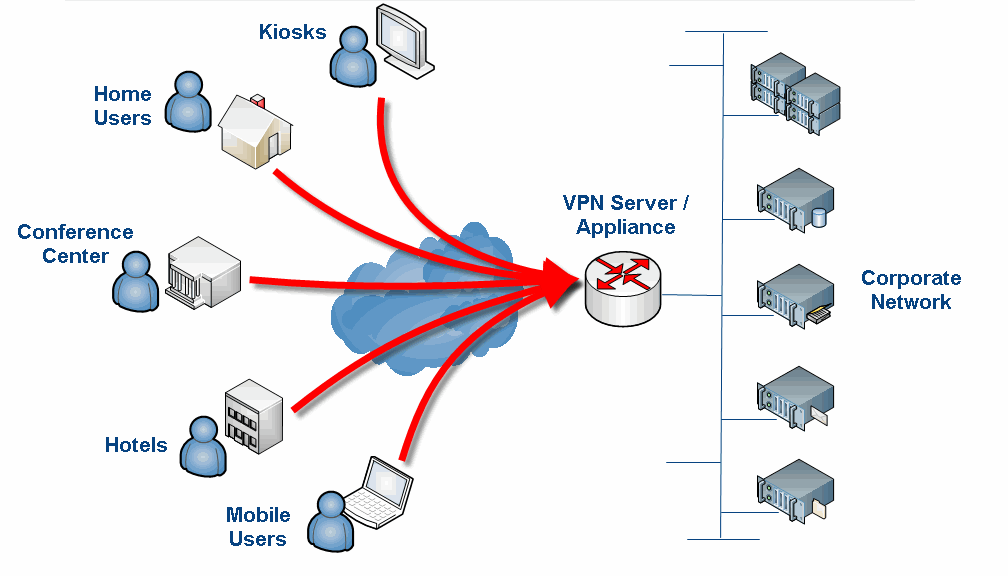
First things first. Let's break down what Mikrotik L2tp VPN even is. Well, dear readers, it's a type of virtual private network that allows remote users to securely access an internal network. It's great for businesses with remote employees who need access to shared resources, or even for individuals who want more secure online activity.
Now, for the fun part. Let's dive into how to set this puppy up.
1. First, you're going to want to make sure you have the latest version of Mikrotik RouterOS installed. Trust me, you don't want to be going through all these steps with an outdated version. It'll just make your life harder, and we're all about making things easy here.
2. Next, you're going to need to create a new PPP user. PPP (Point-to-Point Protocol) is a method for transmitting network traffic using a serial interface, and it's what we'll be using to set up our L2tp VPN. To create a new PPP user, go to the PPP menu in your Mikrotik RouterOS settings, and then click on "Secrets". From there, click the "+" button to create a new user. Fill in the necessary information, like a username and password, and make sure you select "L2tp" as the service. Easy peasy.
3. Once you've created a new PPP user, it's time to set up the L2tp server. Head to the PPP menu, and click on "L2tp Server". From there, click on the "Enabled" checkbox, and then select the PPP user you just created in the "Default Profile" dropdown menu. It's important to note that you may need to configure additional settings here, depending on your specific needs. But for now, let's just stick to the basics.
4. Almost there! Now it's time to configure the NAT (Network Address Translation) rule. This step is necessary to allow your remote users to access the internal network. Go to the IP menu in your Mikrotik RouterOS settings, and click on "Firewall". From there, select the "NAT" tab, and click the "+" button to add a new rule. Fill in the necessary information, like the chain and action, and then select your L2tp server in the "Dst. Address" dropdown menu. You'll also want to make sure that the "Src. Address Type" is set to "Local", and that you add the necessary addresses to the "Dst. Address" and "To Addresses" fields.
5. Finally, it's time to configure your remote clients. In order to connect to your L2tp VPN, your remote clients will need to have the necessary settings configured. This will involve providing them with the necessary credentials, like their username and password, and configuring their network settings to include the IP address of your L2tp server. You can provide them with this information manually, or you can use a configuration tool to make things even easier.
And that's it, my friends! With these simple steps, you'll be well on your way to configuring your very own Mikrotik L2tp VPN for remote clients. Who knew it could be so easy? And the best part? You'll feel like an absolute tech wizard once you've got it up and running. So go forth, my friends, and enjoy your newfound virtual private network capabilities. Happy configuring!


Post a Comment for "Securing Remote Access Configuring VPN On MikroTik"