The Role Of MikroTik RouterOS In VPN Connectivity
Have you ever wondered how to set up a secure VPN connection using Mikrotik RouterOS? Look no further! We've got you covered with a step-by-step guide on how to get started.
Getting Started
The first step in setting up your VPN connection is to make sure that you have the necessary equipment and software. Here are some things you will need:
- A Mikrotik RouterOS router
- A VPN service provider
- Access to the router's web interface
Setting Up the VPN Connection
Now that you have everything you need, it's time to start setting up your VPN connection. Follow these steps:
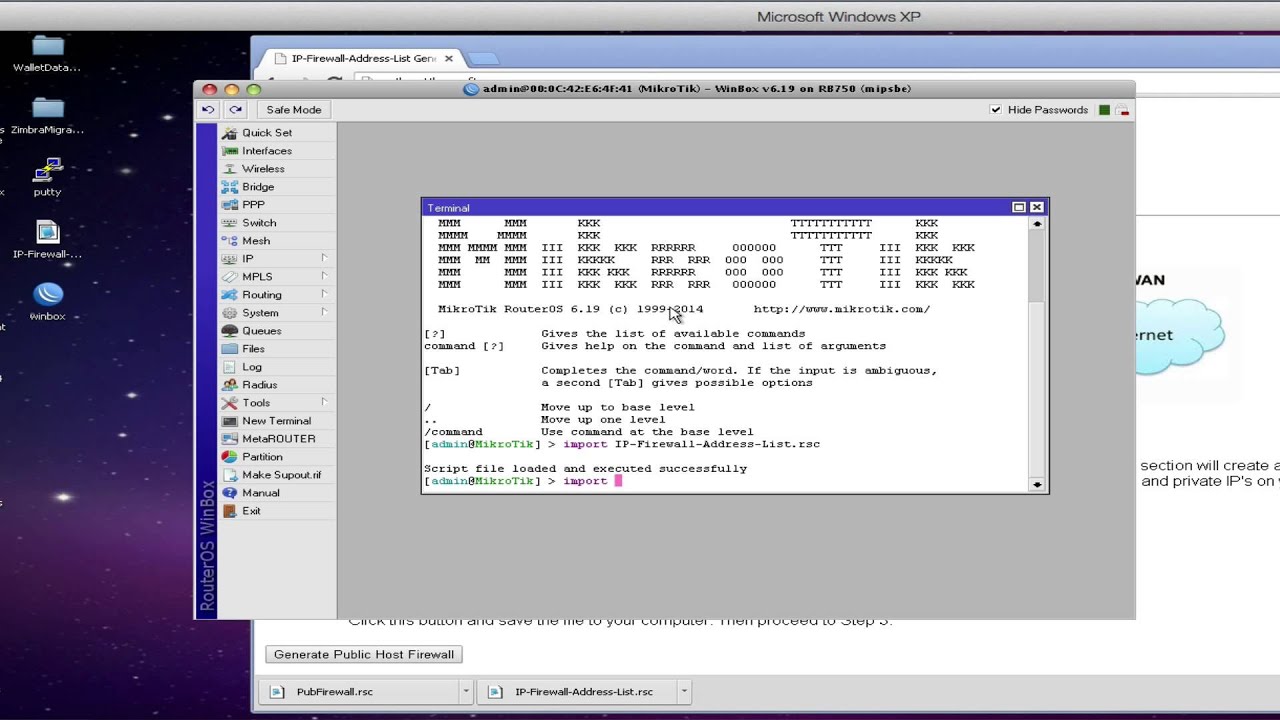
- Log in to your Mikrotik RouterOS web interface.
- Click on the "IP" tab in the left-hand menu.
- Select "Firewall" from the dropdown menu.
- Click on the "NAT" tab.
- Click on the "Add New" button to create a new NAT rule.
- Under "Chain", select "srcnat" from the dropdown menu.
- Under "Out Interface", select your internet-facing interface from the dropdown menu.
- Under "Action", select "masquerade" from the dropdown menu.
- Click on the "General" tab.
- Under "Chain", select "dstnat" from the dropdown menu.
- Under "Protocol", select "tcp" from the dropdown menu.
- Under "Dst. Port", enter your VPN service provider's port number.
- Under "Action", select "dst-nat" from the dropdown menu.
- Under "To Addresses", enter your VPN service provider's server address.
- Click on the "Action" tab.
- Under "Action", select "mark routing" from the dropdown menu.
- Under "New Routing Mark", enter a name for your new routing mark.
- Click "Apply" to save your changes.
Creating the VPN Interface
Now that you've set up the VPN connection, it's time to create the VPN interface. Follow these steps:
- Click on the "Interfaces" tab in the left-hand menu.
- Click on the "Add New" button to create a new interface.
- Select "VPN" from the "Type" dropdown menu.
- Enter a name for your VPN interface in the "Name" field.
- Click "Apply" to save your changes.
Configuring the VPN Interface
Now that you've created the VPN interface, it's time to configure it. Follow these steps:
- Click on your newly-created VPN interface in the "Interfaces" list.
- Click on the "General" tab.
- Under "Mode", select "Dynamic" from the dropdown menu.
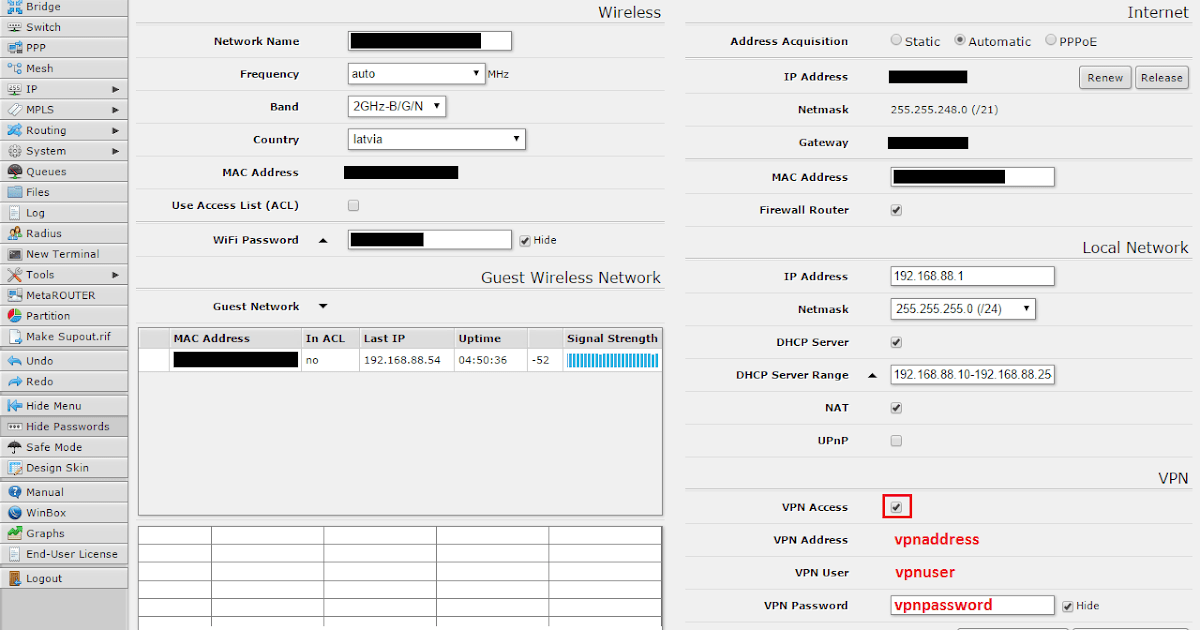
- Under "Remote Address", enter your VPN service provider's server address.
- Under "User", enter your VPN service provider's username.
- Under "Password", enter your VPN service provider's password.
- Click "Apply" to save your changes.
Testing the VPN Connection
Now that you've finished configuring your VPN connection, it's time to test it out. Follow these steps:
- Click on the "Tools" tab in the left-hand menu.
- Select "Ping" from the dropdown menu.
- In the "Address" field, enter the IP address of a website that is blocked in your country.
- Click "Ping" to test your connection.
- If the ping is successful, your VPN connection is working!
Conclusion
Setting up a VPN connection using Mikrotik RouterOS can seem daunting at first, but with these simple steps, you can be up and running in no time. Remember to choose a reliable VPN service provider, and always use caution when connecting to the internet.
Stay safe and secure out there!


Post a Comment for "The Role Of MikroTik RouterOS In VPN Connectivity"