Improving Web Performance With MikroTik Proxy Cache
Do you want to learn how to create a web proxy on your MikroTik router? Look no further! We've got all the details you need to get started.

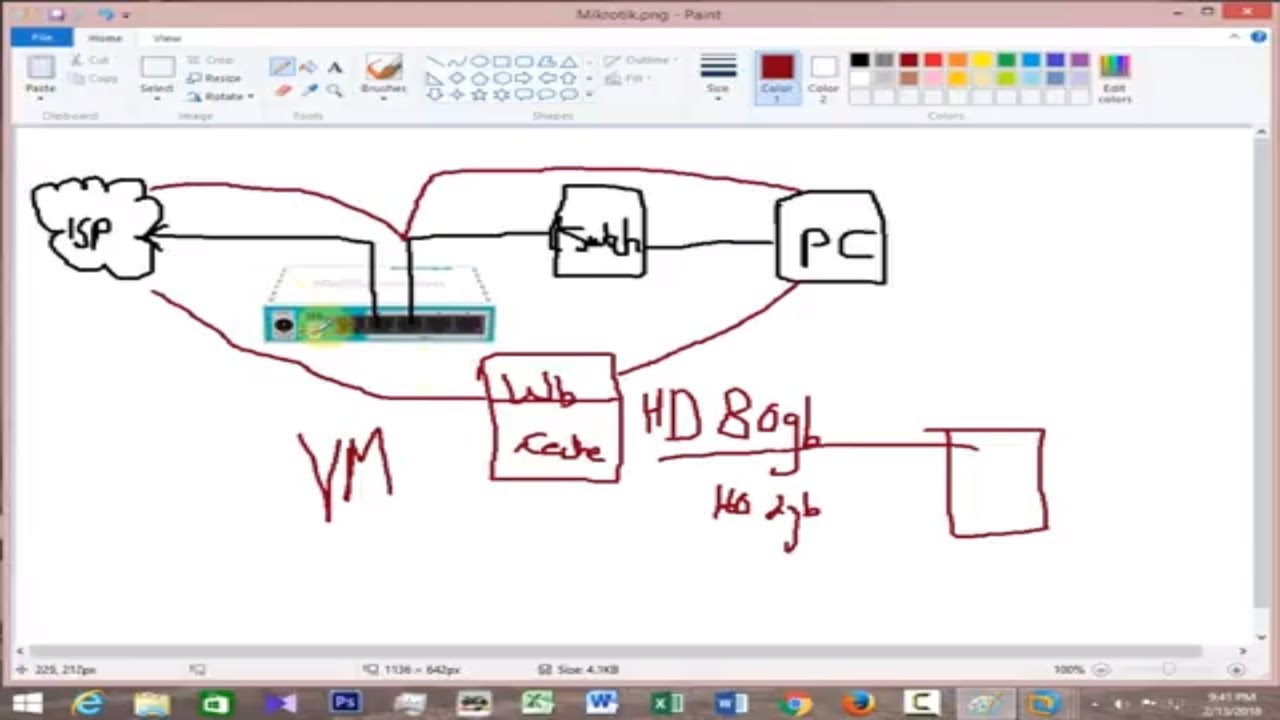
First, let's talk about what a web proxy is and why it can be useful on your network. A web proxy acts as an intermediary between a client and a server, allowing the client to request content from the server without revealing its identity. This means that the client can access content that may be restricted in their location or by their network administrator.
So, without further ado, let's dive into creating a web proxy on your MikroTik router:
Step 1: Enable the Web Proxy
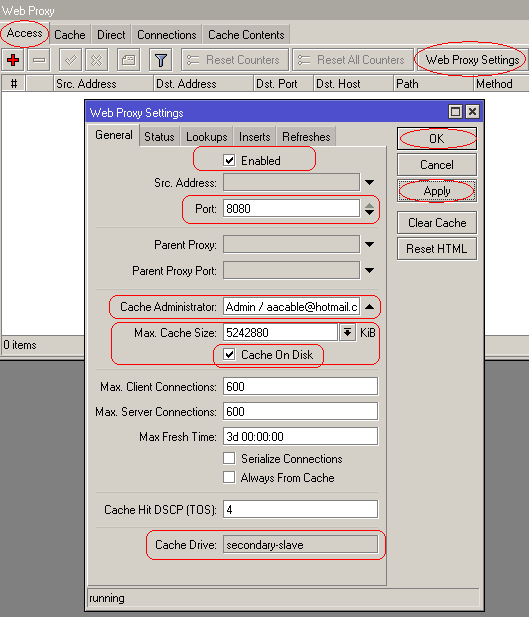
The first step is to enable the web proxy on your MikroTik router. To do this, log in to your router and navigate to the "IP" menu on the left-hand side. Click on "Web Proxy" and then click "Enable" to turn on the web proxy service.
Once you've enabled the web proxy service, you can also set a port for it to listen on. By default, the web proxy will listen on port 8080. If you want to change the port, you can do so in the "Web Proxy Settings" menu.
Step 2: Configure Access
Once you've enabled the web proxy, you'll need to configure access to it. By default, the web proxy will only allow requests from IP addresses within your local network. If you want to allow external access to the web proxy, you'll need to configure access rules.
To do this, navigate to the "IP" menu and click on "Firewall". Click on the "NAT" tab and then click on "Add New". Set the "Chain" field to "dstnat" and set the "Protocol" field to "tcp". In the "Dst. Port" field, set the port that you want the web proxy to listen on (by default, this is 8080). In the "Action" field, select "Redirect". Set the "To Ports" field to "8080".
This will set up a NAT rule to redirect requests on the specified port to the web proxy service.
Step 3: Configure Cache
Next, you'll need to configure caching on the web proxy. Caching allows the proxy to store frequently accessed content and serve it to clients more quickly, reducing the load on your network and speeding up access times.
To configure caching, navigate to the "IP" menu and click on "Web Proxy". Click on the "Cache" tab and then set the "Disk Cache Size" field to the amount of disk space you want to allocate for cached content.
You can also configure other caching options, such as how long content should be cached for and whether the proxy should cache HTTPS content.
Step 4: Configure ACLs
ACLs, or Access Control Lists, allow you to control which clients can access the web proxy and what they can do when they access it.
To configure ACLs, navigate to the "IP" menu and click on "Web Proxy". Click on the "Access" tab and then set up the rules for your desired access control.
You can set rules based on IP address, subnet, or domain name, and you can specify what actions clients are allowed to take when accessing the proxy, such as "allow", "deny", or "redirect".
Step 5: Test Your Web Proxy
Once you've configured your web proxy, you should test it to ensure that it's working correctly. You can do this by accessing a website through the proxy and verifying that the content is being cached and served correctly.
To test your web proxy, you can use a web browser or a tool like cURL to make requests to the proxy. For example, if your proxy is listening on port 8080 and you want to access the website "example.com", you can use the following command:
curl -x http://localhost:8080 http://example.com This will make a request to example.com through the web proxy and display the response.
In Conclusion
Creating a web proxy on your MikroTik router can be a great way to improve access to content on your network and protect your clients' identities. By following these steps, you can configure a web proxy that meets your specific needs and provides the level of access control and caching that you require.

Post a Comment for "Improving Web Performance With MikroTik Proxy Cache"