Improving Network Efficiency With MikroTik Router Proxy Server
Setting up a web proxy server is a common task for system administrators. It can help reduce bandwidth usage, improve browsing speed and privacy by caching frequently accessed websites. In this tutorial, we will walk through the steps to configure a web proxy server on a MikroTik Router. Along the way, we'll cover the advantages and disadvantages of using a web proxy, its different types, and how to configure basic caching and access control.
Advantages and Disadvantages of Web Proxy
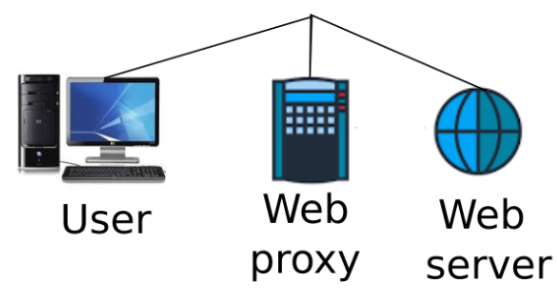
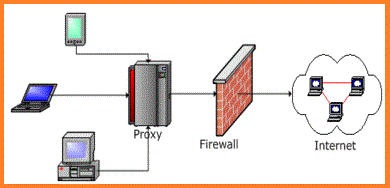
A web proxy is a server that acts as an intermediary between clients and web servers. It receives requests from clients and forwards them to the appropriate servers. The response from the server is then sent back to the client via the proxy. There are several advantages and disadvantages to using a web proxy server.
Advantages
- Bandwidth savings: Since a proxy server can cache content, it can help reduce bandwidth usage. For example, if multiple clients request the same content, the proxy can serve it from its cache instead of downloading it multiple times.
- Improved browsing speed: Caching also helps improve browsing speed by serving frequently accessed content from the proxy cache. This reduces the time it takes to download content from the original server.
- Privacy: A proxy server can also provide some level of privacy by hiding the client's IP address from the destination server. This can help protect the client from being tracked or monitored.
- Access control: A proxy server can be used to restrict access to certain websites or content. This can help improve network security by preventing users from accessing malicious or inappropriate content.
Disadvantages
- Increased latency: Since requests have to pass through the proxy server, there can be some additional latency. This can result in slower page loads and slower browsing speeds.
- Single point of failure: If the proxy server goes down, clients won't be able to access the internet until it's restored. This can lead to downtime and lost productivity.
- Security risks: A proxy server can also introduce security risks if it's not properly configured. For example, if it's not configured to block malicious traffic, it can be used to launch attacks on other servers or clients.
Types of Web Proxy
There are several types of web proxy servers with different functionalities. Below are some common types:
Transparent Proxy
A transparent proxy is a proxy server that doesn't require any configuration on the client's side. It intercepts all traffic and forwards it to the destination server. Clients are unaware of its existence and the proxy doesn't change the content in any way.
Anonymous Proxy
An anonymous proxy server identifies itself as a proxy server but does not disclose the originating IP address of the client. This can provide some level of anonymity for clients, but it can also be used by attackers to launch attacks or bypass content filters.
High Anonymity Proxy
A high anonymity proxy is a proxy server that doesn't disclose the originating IP address of the client and doesn't identify itself as a proxy server. This provides the highest level of anonymity for clients but can also be used by attackers for malicious purposes.
Configuring Web Proxy on MikroTik Router
Now that we've covered the basics of web proxy servers, let's walk through the steps to configure a web proxy on a MikroTik Router.
Step 1: Enabling Web Proxy
The first step is to enable web proxy on the router. To do this, open the terminal and type the command below:
/ip proxy set enabled=yes
This enables the web proxy on the default port of 8080. To change the port number, use the command below:
/ip proxy set port=8081
This sets the web proxy port to 8081.
Step 2: Configuring Basic Caching
Now that web proxy is enabled, we can configure basic caching. This will allow the router to store frequently accessed content in its cache and serve it from there. To enable caching, use the command below:
/ip proxy set cache-administrator=webmaster \ cache-size=1024KiB \ max-cache-object-size=512KiB \ max-client-connections=600 \ max-server-connections=600 \ parent-proxy=0.0.0.0 \ parent-proxy-port=0 \ proxy-arp=yes \ serialize-connections=no
This command sets up the cache administrator to "webmaster", configures the cache size to 1024KiB, sets the maximum cache object size to 512KiB, and limits the maximum number of client and server connections to 600. It also sets up a parent proxy if needed, enables proxy ARP, and disables connection serialization.
Step 3: Configuring Access Control
The last step is to configure access control to restrict access to certain websites or content. This can be done using firewall rules. For example, to block access to a certain website, use the command below:
/ip firewall filter add action=drop chain=forward dst-address=www.example.com \ dst-port=80 protocol=tcp
This command drops all TCP traffic to the destination address of "www.example.com" on port 80. For more advanced access control, you can use Layer 7 protocol inspection to block specific types of traffic.
Conclusion
In conclusion, setting up a web proxy server on a MikroTik Router can help reduce bandwidth usage, improve browsing speed, and provide some level of privacy and access control. However, it's important to weigh the advantages and disadvantages carefully and properly configure the proxy server to avoid security risks and downtime. By following the steps outlined in this tutorial, you should be able to configure a basic web proxy server on your MikroTik Router.

Post a Comment for "Improving Network Efficiency With MikroTik Router Proxy Server"